Overview | User Roles | Create a Workspace | Add Notes | Export Notes | More Information
Overview
When you log into the Digital Scholar Lab, it will ask you to select your workspace. Everyone has their personal workspace, which is private, but users can also create or join group workspaces. These allow for collaboration between users at the same institution. You can create or join many groups, each of which will have separate collections, cleaning configurations, analysis results, and notes.
These groups are flexible and are meant to meet many use cases, for example:
- Multiple students doing group work
- Workshop attendees using the same sample data/pre-run analyses
- Classroom settings
- A graduate student showing their work to a supervisor
User Roles
All users in a workspace can do the following:
- Accept invitations to join workspaces and leave when desired
- Create, modify, and delete collections and cleaning configurations
- Run analyses
- Create notes (signed or anonymous)
- Delete your own notes, but not other's
- Read, filter, and export notes (see Add Notes and Export Notes below)
Creators of a workspace have additional privileges:
- Only the creator of a workspace can delete it
- The creator can remove other users but cannot be removed by others
Create a Workspace
-
On the popup titled "Please Select Your Workspace," click "Create New Workspace."

If you are already logged in, you can click on the button on top-right corner to create a new workspace.
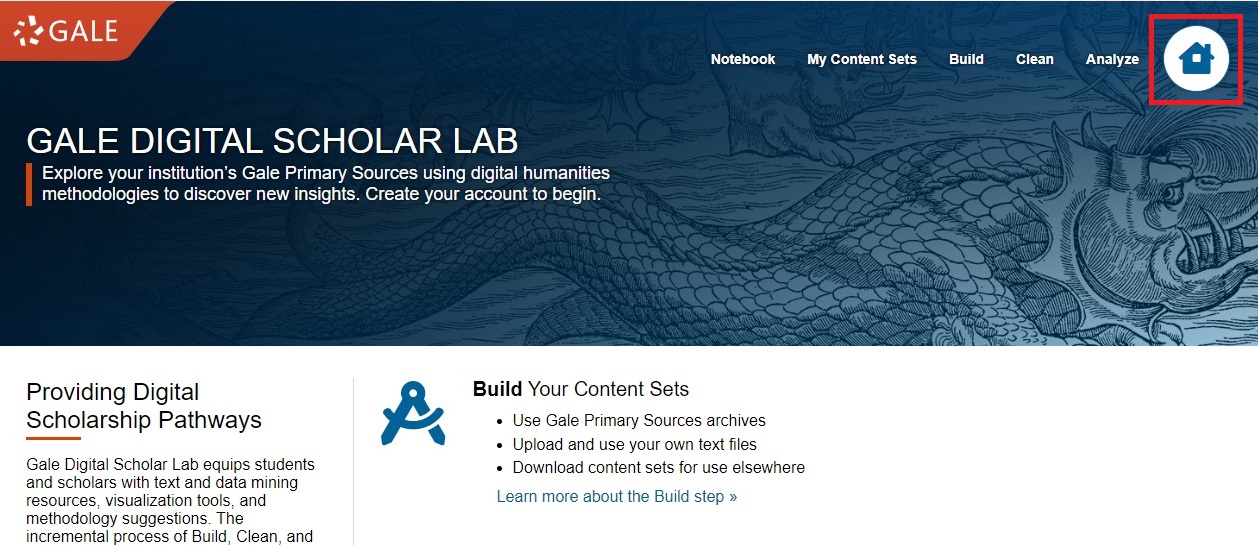
Note: the first time you log in, you may be asked to pick a display name and avatar for yourself. This icon will appear beside your name in comments and workspaces. See the tutorial section on Access for help setting up your account.
-
Fill out basic information for your group: add a Group Name, the email of at least one Collaborator, and then click Create.
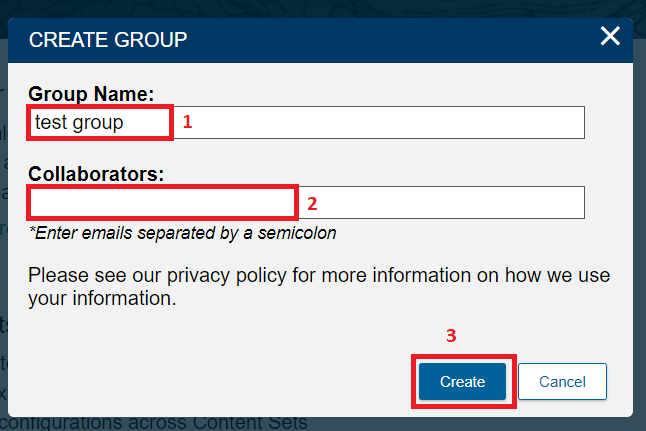
Your collaborators will each receive emails inviting them to the group. Once they log into the Digital Scholar Lab, they merely need to click Accept Invite and they will join your workspace.

-
As group creator, you can modify group settings, including the name, and invite or remove collaborators by clicking on the Edit button next to Collaborators.

-
Here you can change the icon for your group, rename your group, and invite additional collaborators by adding their emails. After making changes, click Save to finalize them. On this page, you can also delete your workspace

-
See User Roles above to see what everyone in your workspace can do, and more specifically what you alone can do as creator
Add Notes
You can add notes from most places in the Digital Scholar Lab, and your Notes page will show where you created those notes, e.g. whether while you are building a collection or running an analysis.
-
Let's say that you wanted to share notes with your collaborators on how you built a collection of texts. On the top toolbar, click on Build.

-
For the purposes of this example, let's say you're working on a project about the history of coffee. Under Search, type Coffee and press enter.

Note: you can consult much more complex search strategies, including uploading texts, in our instructions on building text collections.
-
Click on the Add Note button.

-
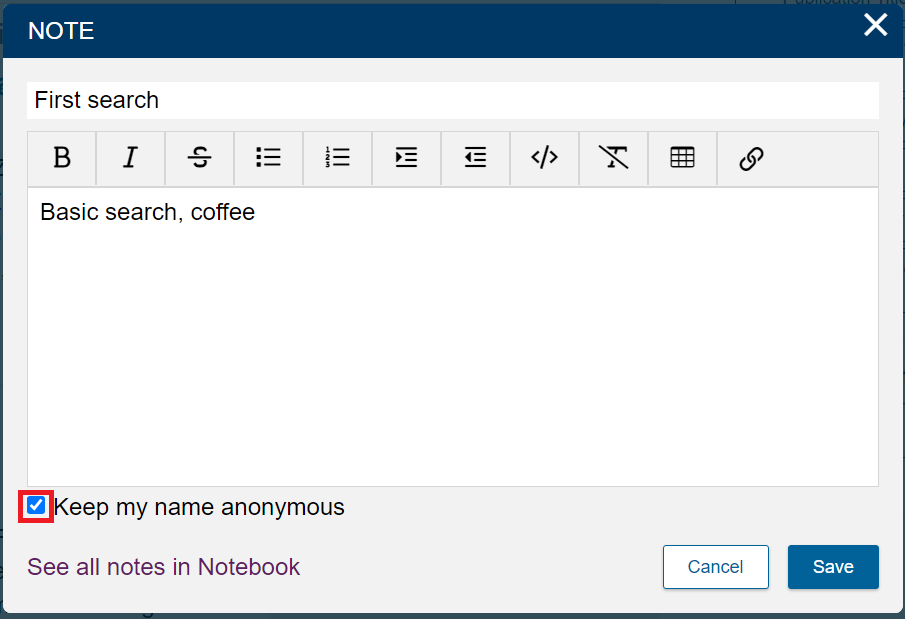
Add a title - say, "First search" - and some text, "Basic search, coffee."

-
Optionally, click that you want this note to be anonymous.
-
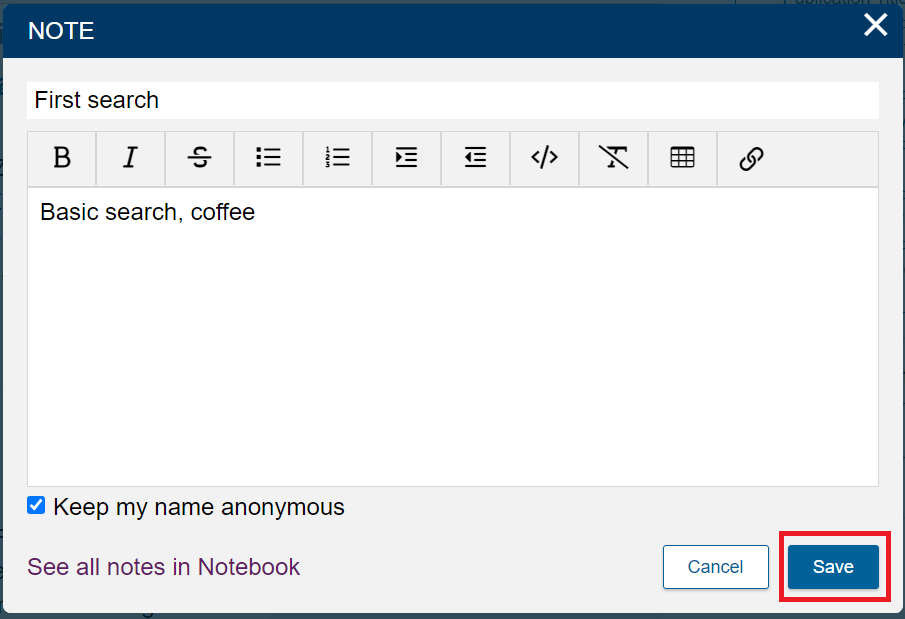
Click Save.
-
There will be a popup saying that the note has been saved. Click Close.

-
But you can also make notes on individual texts. Click on the title of the first text in your search. (For me, that's "Brazilian Coffee Situation" but yours might be different.)

-
In this document view, click on Add Note. Repeat the above steps to create a second note.

-
This time, when you create the note, click "See all notes in Notebook."

Alternatively, you can always access your workspace's notes by click on "Notebook" on the top toolbar.

-
Here you can view all notes (whether you or another group member created them), filter them by date, location (i.e. where in the Digital Scholar Lab they were created), by author, and by additional filters, including free text for search terms.

Note: once you have run an analysis tool, you can create notes that save visualizations of specific runs. This is great for comparing different results and for documenting your findings.
-
Borrowing an example from later in this tutorial, once you have run a tool, click on Add Note on the results page.

-
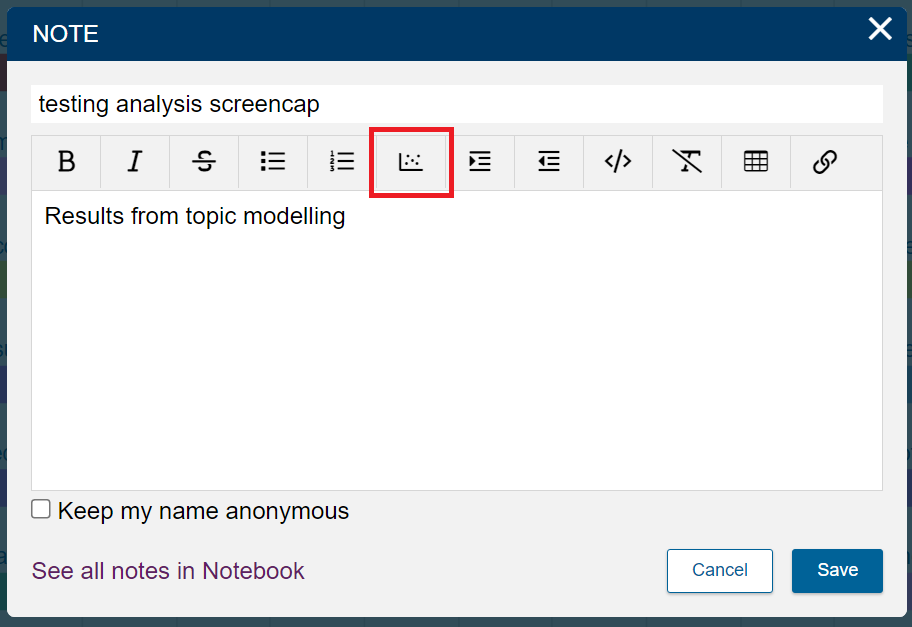
Add a title and text as before, then click on the Capture Analysis Image button to add a screenshot of your analysis results.
-
Your note popup will now include an Analysis image in a new Attachments section. Click on Save.

-
On the top toolbar, click on Notebook. Your note will include a resizeable screenshot of your analysis results.

Export Notes
-
Click on Notebook on the dashboard.

-
Select one or more messages, or select all.

-
Click the Export button.

-
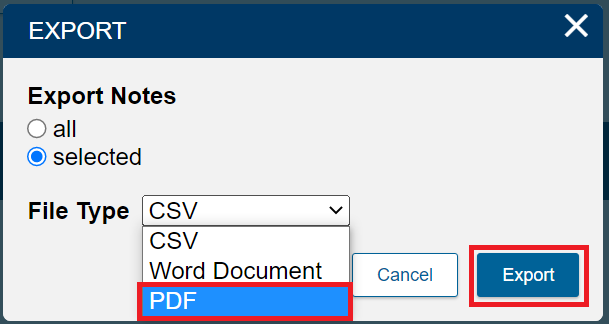
Select either all or a selection of notes, and then select a file type.

-
You can select CSV (for a spreadsheet that opens in Excel), Word Doc, or PDF. After making your selection, click Export.
-
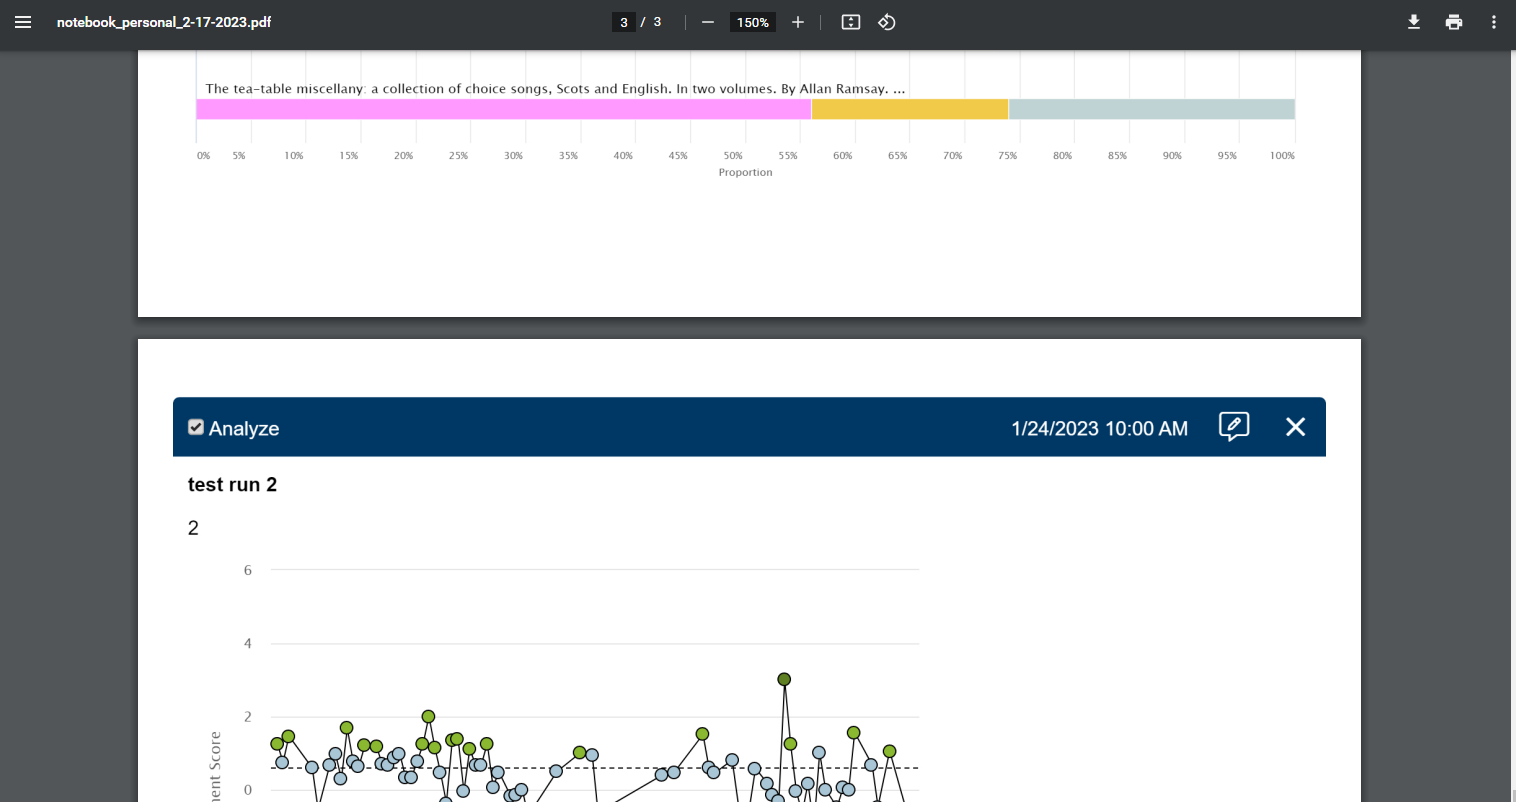
Your browser will download the relevant file!
More Information
For more information, see this official video on the uses and purposes of groups.
Proceed to building a collection