This tutorial has been developed for OpenRefine version 3.7.5
Sometimes when you construct an API call and use the Add Column by Fetching URLs feature, it won’t work. In these cases, you can use python to help. So far we’ve been writing GREL expressions to create values to populate new columns, but we can also run python scripts to do that, especially when what we need to do is a bit more complicated or harder to do using GREL.
Note on Python: There are many ways to set up python on your computer. This activity assumes that you have Anaconda (https://www.anaconda.com/download) installed and that you know the path on your computer to where your additional python libraries are installed. This varies, even with Anaconda installed. I will be using the path that works on my computer, but this might be different for yours. Contact mdl@library.utoronto.ca if you need help with this setup.
Augmenting Data using Python
1. Wikimedia provides a web API that we can use to access Wikipedia data. To learn more about how to use this API, see: https://en.wikipedia.org/api/rest_v1/
2. This page helps you construct URLs to make specific API calls. You can expand the section you are interested in, fill in the form and click on the Try it Out button to see what results you will get from a call. For our example, we are going to use the summary page example. On the Wikimedia REST API documentation page, first expand Page Content.

Next, find /page/summary.

This instructs us that the URL is formed by "https://en.wikipedia.org/api/rest_v1/page/summary" + value, where value is the title of the page. If we google “wikipedia jane austen”, we will see that the URL normally has a title formed by the first name, then last name, with all spaces replaced by underscores.

3. So first we need our author names in that format to make this call – which we already partially did in Augmenting Activity 1. We reversed the names, but we have not replaced the spaces with underscores yet. From the Full Author Name column pull down menu, select edit cells > transform. To use the GREL replace function to substitute spaces with underscores, type:
value.replace(" ", "_")If the preview looks correct, click on OK to apply the transformation.

4. Now that we have our author names in the correct format, we are ready to make our python call. You might be wondering why we can’t just use the Add Column by Fetching URLs feature in OpenRefine. If you want, give it a try and see what happens. You should see a column of blanks. The API works, but it is doing things that OpenRefine doesn’t expect. But we have another option; we can use python to make the API call.
5. To use python in this way, we have to make sure we have the urllib3 python library installed, as this library allows us to make API calls.
Note: A python library is just additional code that can help you extend what you can do with python. When you install Anaconda, it comes with various common python libraries installed. But it is common practice to install other libraries to augment what you can do with python, so Anaconda also allows you to install additional libraries.
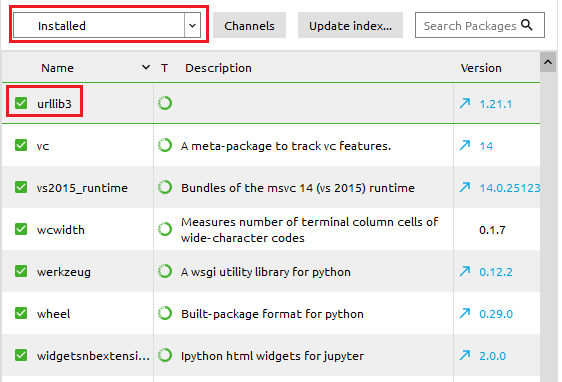
To check which libraries are installed, just start up Anaconda Navigator and go to the Environments section. There you can see what libraries are installed and search for new libraries to install.

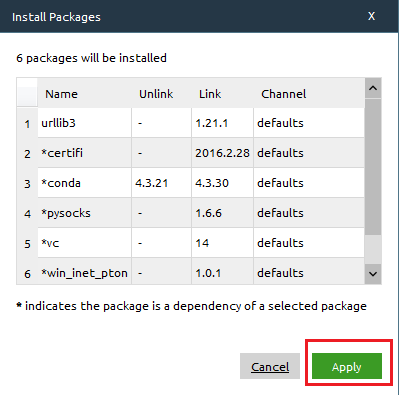
Note: If urllib3 is not installed, first, change the dropdown menu from “Installed” to “All.” Second, search for urllib3. Third, once it shows up in the list, select the check box next to its name. Fourth, click Apply at the bottom of the window.

A window will pop up with a list of packages in or required for urllib3. Click Apply again to confirm.

6. After we install urllib3, we need to know where it is installed on our computer (i.e., what is the path to the folder). This is going to vary by how python and even Anaconda is set up. In the Map & Data Library computer lab, the file pathway is C:\Program Files (x86)\Esri\Data Interoperability (x86)\python
Note: One way to do this, is to click on the play button next to “root” from the Environments section in Anaconda Navigator, and select “Open Terminal”. You should see a path to where Anaconda is installed, which can help you get started looking for where the urllib3 folder is. Try looking for folders like “Lib” or “library” from where it is installed. In there, try looking for a folder called “site-packages”. This is where my personal urllib3 folder is, but yours might be somewhere else. Feel free to contact mdl@library.utoronto.ca for help with this.

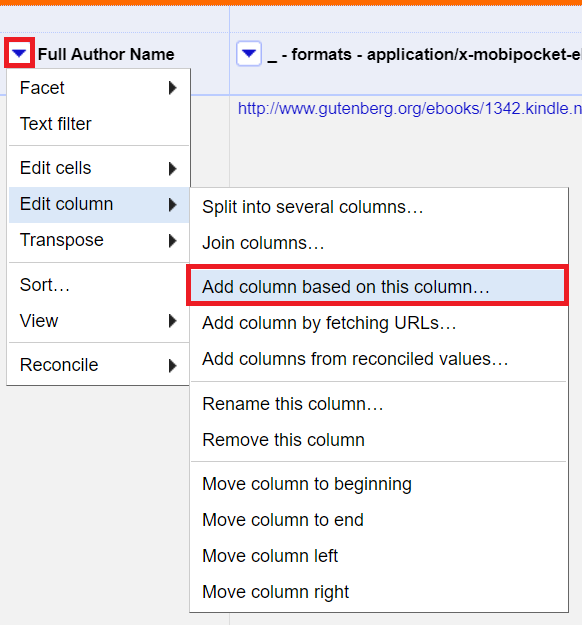
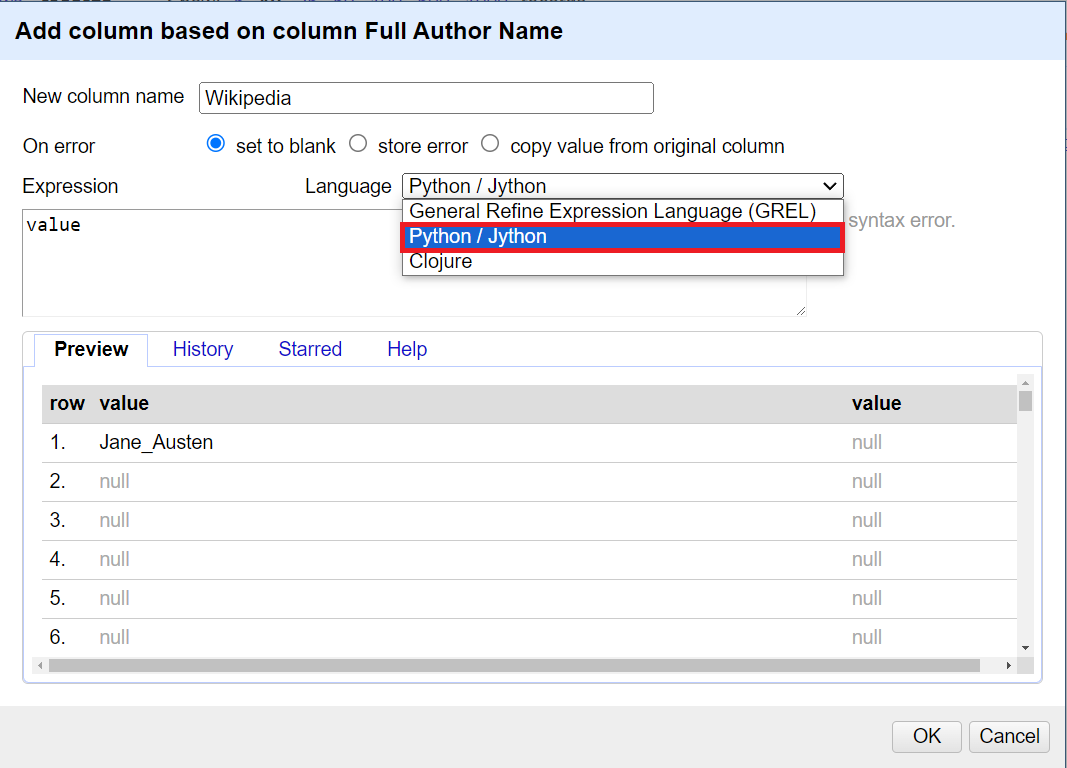
7. Now we are ready to create a new column and populate it with data from our API call. From the Full Author Name column pull down menu, select edit columns > add a column based on this column and give it the name Wikipedia.

8. You should notice there is a pull down menu that currently shows GREL as our expression language. Pull down and select Python/Jython instead.

For the expression, type:
import sys
sys.path.append(r'C:\Program Files (x86)\Esri\Data Interoperability (x86)\python')
import urllib3
http = urllib3.PoolManager()
url = "https://en.wikipedia.org/api/rest_v1/page/summary/" + value
r = http.request('GET', url)
if r.status == 200:
  return r.data
else:
  return r.status
10. This python code tells OpenRefine where my python libraries are installed on my computer. You would modify the sys.path.append line to point to where your urllib3 library is installed on your computer. Then you tell it that you want to use the urllib3 library.
More info on this can be found here: https://github.com/OpenRefine/OpenRefine/wiki/Extending-Jython-with-pypi-modules
For the python code to make the API call, I used this library’s documentation here: https://urllib3.readthedocs.io/en/latest/.
For this tutorial, the URL for the API that we determined earlier : "https://en.wikipedia.org/api/rest_v1/page/summary/" + value
I also added an "if" statement at the end to tell it to return the data if all is well (i.e., getting the status code equal to 200) or return the status code to see if something went wrong.
Note: Make sure that you indent the two return statements. Also, if you see “internal error” just wait a few seconds, as there is a delay. You should see the results pop up in the preview window.
11. Click on OK.
12. You should see that the call worked and the JSON data is in my new wikipedia column. Finally, I need to create a new column that pulls out the summary extract about the author. From the wikipedia column pull down menu, select edit columns > add a column based on this column and give it the name Author Bio.
13. Change the language back to GREL. For the expression, type:
value.parseJson()["extract"]We can see from the preview that we have grabbed the part of the JSON data we are looking for. Finally, click on OK.

You should see that our dataset is now augmented with a new column with information about each author in our dataset.

And that's it! You've now successfully augmented the original dataset with data from Wikidata and Wikipedia, using OpenRefine's reconciliation service and python.