This tutorial has been developed for OpenRefine version 3.7.5
To learn more about reconciliation services and how you can use them to augment your data, check out the official OpenRefine guide to reconciling Feel free to read just the introduction and “Basics” sections for now, and then to return to this resource later if you like.
We are going to try out a reconciliation service that comes with OpenRefine to connect with Wikidata. Wikidata is a free, secondary database, collecting structured data to provide support to its related websites, such as Wikipedia.
The goal of this activity is to reconcile the titles of books we have in our dataset with the Wikidata website. This means we can look up our books in the Wikidata database, link Wikidata pages with our books, and supplement our book information with data from this database. Here is an example of a Wikidata page for one of our books, Pride and Prejudice: https://www.wikidata.org/wiki/Q170583.
In this activity, you are going to:
Reconcile (match) the titles of books with Wikidata
Add new columns of data from Wikidata
Reconcile (match) the titles of books with Wikidata
1. Make sure that you are using the new project we created from the books.json file in activity 1.
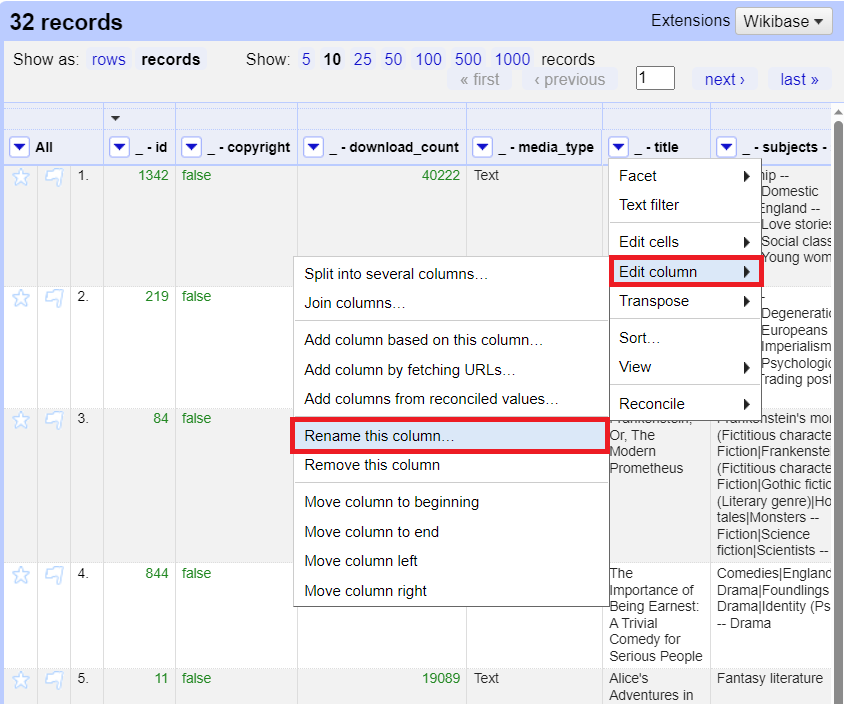
2. Before we begin, we need to rename the title column to exclude any special characters, such as _ or -. If left in, special characters can cause errors in later steps.
To rename the column, from the _ - title column pull down menu, select edit column > rename this column. Rename it 'title'.

3. From the title column pull down menu, select reconcile > start reconciling.
Note: If it gives you an error while trying to reconcile, make sure your column name contains no special characters.
4. You should see the Wikidata service available. This screen is where you could also add links to other reconciliation services by clicking on the Add Standard Service and providing a URL for the service. We are going to use the Wikidata service, so click on it in the list.

5. Here you are given a list of different types that your records could be. Let’s go with literary work. This means that we are matching our titles to literary work entities in the Wikidata database.

6. We can also provide other information to help with the matching using the list on the right. Next to our Full Author Name field, check the include check box and start typing the word “author” in the blank field next to it. You should see the option “author...main creator...” show up as you start typing it, so click on it to select it. Make sure to select to include it.

7. Click on the Start Reconciling button at the bottom of the window.

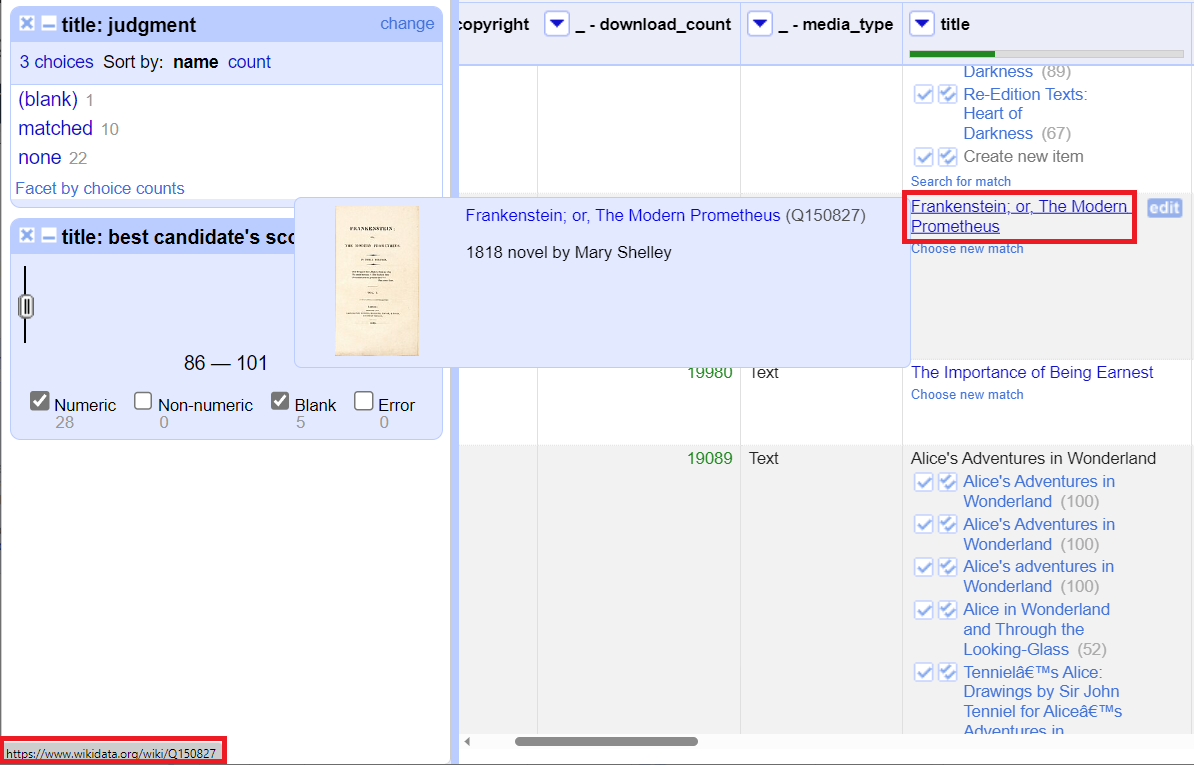
8. You should see that values in your title column have changed. If they are now written in blue that means that they matched. They are now actually hyperlinks – click on one to see the corresponding page in Wikidata.

9. Reconciling does not normally match everything perfectly. You should see that 2 new facets have been created on the left. The judgement facet tells you how many matched and how many didn’t match (we can ignore any blanks here). Click on the none option to see the records that didn’t match. The second facet is for the match score. If items have a high score, they are considered more likely to match. Let’s leave this facet alone for now.

10. Now we are just looking at the records that didn’t match. We will have to go through each one and make decisions to find matches manually.
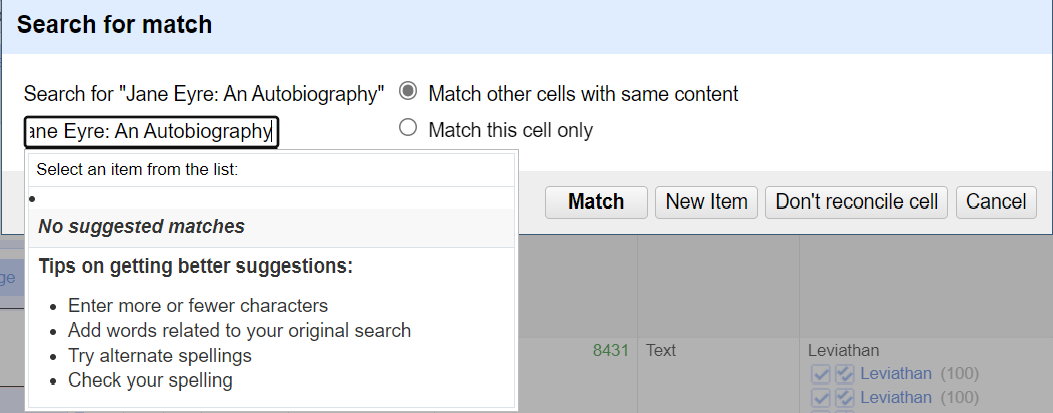
11. If the title is grey with no options below it other than to create new item, click on search for match. Try this with Jane Eyre: An Autobiography title.

Sometimes the options are confusing, may not show up properly, or no matches will be suggested. Often, the book can be found by simplifying the title (i.e., removing subtitles and beginning articles such as "the").

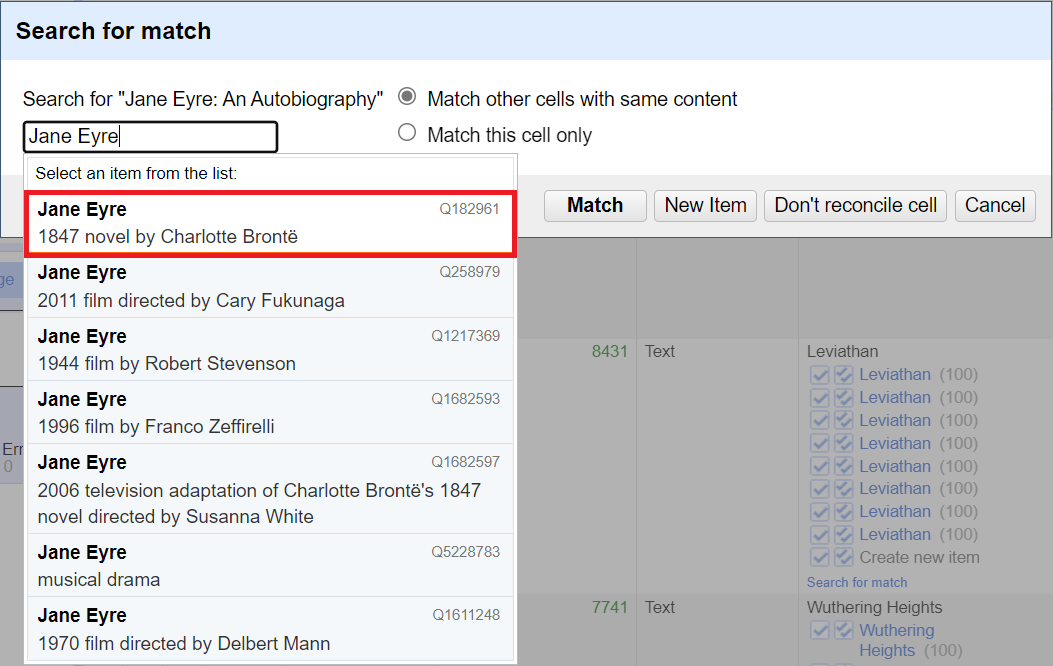
In the search box - change what it is searching for by erasing all the text after the word "Eyre".
Now it should be able to find some potential matches. You can hover over each option to find the one that makes sense to match - in this case the first one, a literary work. Select it. It is now matched, and will no longer show up in our list of unmatched items.

12. In some cases, there are some potential matches listed, with their match scores (out of 100) in parentheses next to it. You can click on each option to decide which is correct. In these situations, you are presented with a box with one checkmark and one with two checkmarks.
If you only want to match this one record/row, select the box with one checkmark. If on the other hand we had multiple entries for this title in our list, we could select the second box with two checkmarks to match everywhere it is found in the list. We know that for our dataset, each book title is unique, so we can select the box with one checkmark next to the correct item, as appropriate.
Each of the suggested matches is a link to a different Wikidata entry. Be careful when selecting, since the correct option is not always shown. When in doubt, use the search for match option.

Sometimes the item will be found right away in the search, even though it wasn’t found through the reconciliation process. These are just quirks of the system. So go through the unmatched records and find matches. When done, reset the facets.
Add new columns of data from Wikidata
13. Once you have your data matched to the Wikidata database, a benefit of reconciliation is that you can then easily add additional columns of data to augment your dataset. From the title column pull down menu, select edit columns > add column from reconciled values…
Note: This option only appears in more recent versions of OpenRefine.
14. From this window, you can click on items from the suggested properties window to add those columns of data to your dataset. For example, click on language of work or name. You should see a preview of the data on the right.
Note: There might not be any data for this property for all of your books. Some properties might even be blank for everything in your dataset.
Once you have selected your additional properties, click on OK to add those columns to your dataset.

15. Not only can you select from the suggested properties list, but you can also search for a property. As you search, it should offer a suggestion underneath the search field. If you are unsure what properties are available, check out a sample Wikidata page to see. For example, click on the title for Pride and Prejudice to bring up its linked page.

Scroll down the page to see all the properties available. Let’s add one. From the title column pull down menu, select edit columns > add column from reconciled values… Search for “characters” in the search box at the top. This should add a column with data on the main characters of the book. You should see an example in the preview window on the right. Click on OK to add that column to your dataset.

16. Try adding more columns from the Wikidata database either by adding suggested properties or by searching. If you add something by mistake, you are able to remove it from the preview window.
So you can see that although there is some manual work involved in using reconciliation services, they can be an easy way to normalize your data, and then augment it with additional information.
For more reconciliation services to try, check out this list: https://github.com/OpenRefine/OpenRefine/wiki/Reconcilable-Data-Sources
Now you’re ready for OpenRefine Augmenting Activity 3: Using Add Column by Fetching URLs