Due to the University of Toronto ArcGIS Online Data Retention Policy (effective January 1, 2024), the Map & Data Library now conducts data cleanups on a regular basis. As part of this process, UofT user accounts that have not been accessed for over 12 months may be deleted, along with all associated content (e.g., datasets, maps, apps).
To support the long-term preservation of ArcGIS projects for individuals who are no longer affiliated with the university, this tutorial is intended to assist UofT students, faculty, and staff in transferring and storing work in a personal (public) account.
Tables of Contents
Transferable Items
Exporting Tools
Tool Limitations
Format Considerations
Exporting Data from Item Page
Exporting Data using Extra Data tool
Uploading Data to Public Account
Learning More
Transferable Items
To transfer data from an institutional ArcGIS Online account to a public (free) account, you can export only those layers that you own or that have export permissions enabled.
More complex items (e.g. web maps, StoryMaps) cannot be exported in full. To transfer these, you will need to manually download the individual assets (e.g., spatial layers, images, audio files) and recreate the item in your public account.
If you need assistance transferring a StoryMap or Instant App to your public account, please contact us using the support form. Note that certain applications (e.g. Experience Builder, Dashboards, Survey123) are not supported in public accounts.
Exporting Tools
We will cover two exporting tools in this tutorial: Export Data function on an individual item’s Details page and the Extract Data tool.
Export Data is a feature on the Item Details page in ArcGIS Online that allows users to export data in various formats, including Shapefile, CSV, KML, Excel, File Geodatabase (FGDB), GeoJSON, and GeoPackage. Only hosted feature layers can be exported. To learn more about the definition, see feature layers. For detailed instructions, see ArcGIS Online: Export data from hosted feature layers.
Extract Data tool is a geoprocessing tool in ArcGIS Online that packages feature layers and tables into formats such as CSV, File Geodatabase (.zip), Shapefile (.zip), and KML. This tool creates an item within your content that contains the data from the selected layers. You can download the data directly from the item. While powerful, the tool is applicable to layers that can be opened in Map Viewer. For detailed information on limitations, see the documentation here.
Tool Limitations
Exported files may take some time to process and might not be fully restorable in a public ArcGIS Online account. For the tools covered in this tutorial, please note the following common limitations:
- The time to export data from ArcGIS Online varies significantly depending on the size of the dataset, the internet connection, and the chosen export format. It can take anywhere from a few minutes to several hours, or even longer for large datasets.
- Some specialized layer types (e.g., raster layers, time-enabled layers, or certain 3D layers) may not be compatible with both tools.
Format Considerations
While ArcGIS Online supports a variety of export formats, public accounts only support uploading files in CSV, KML, and GeoJSON formats. When transferring data to a public ArcGIS Online account, it is important to understand the limitations of each supported file format:
- GeoJSON: Full feature properties (such as symbology and styles) may not be preserved during export/import. To maintain the same visual representation in the new map project, manual adjustments will be required after import.
- KML: While visible features are generally preserved, KML offers limited post-import editing capabilities. For example, you will not be able to adjust styles or configure pop-ups within ArcGIS Online after the import.
- CSV: Only non-spatial attributes are retained unless the file includes latitude and longitude columns. Without spatial data, the CSV file cannot be imported as a spatial layer into a new map project.
Exporting Data from Item Page
1. Log in to ArcGIS Online using organization’s URL and UTORid account (see instructions here).
2. Go to Content tab, navigate and click on the item in Feature layer (hosted) format.

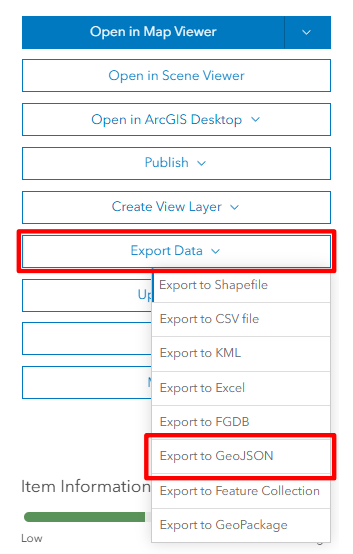
3. On the layer's item details page, under the Overview tab, click Export Data, then Export to GeoJSON.
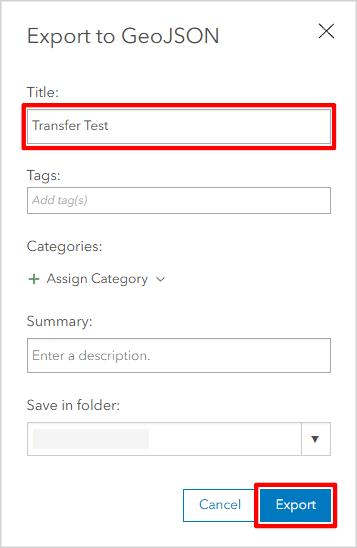
4. Enter a title for the new file and add any other information. Then, click Export.
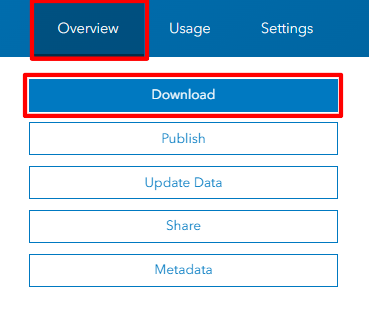
5. A new item page will open. On the Overview tab, click Download to save the file in the local computer.

Exporting Data using Extra Data tool
1. Go to Content tab, navigate and click on a map item to start.
2. Click Open in Map Viewer.
3. In the menu in the toolbar on the right, click Analysis icon, select Extract Data under Manage data.

4. For Input layer, select the desired layer or layers. You can choose multiple layers here.
5. For the Result layer, specify the output data format, output name, and location.

6. Click Estimate Credits to check if you have enough credits. To view your remaining credits, click your profile in the top right corner, go to My Settings, and then select Credits. If you don’t have enough credits to run the tool, please contact the Map and Data Library using the support form.
7. Make sure you have enough credits, and click Run.
8. Go to History tab to check the processing statues and output.

9. Once the task is completed, click on the task record. In the open tab, click the three-dot icon and select Open Item Details.

10. A new item page will open. On the Overview tab, click Download to save the file in the local computer.
Uploading Data to Public Account
1. If you don’t have an ArcGIS Online public account, use this link to create one.
2. Log in to your ArcGIS Online public account using your ArcGIS login credentials.

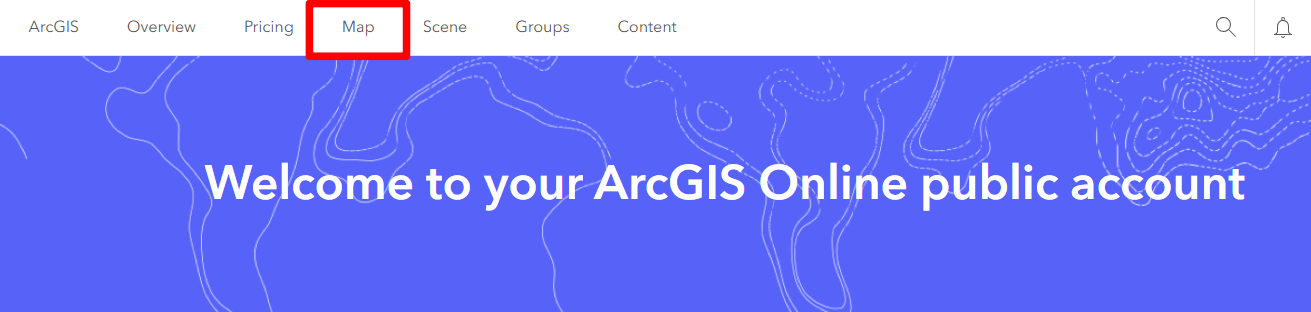
3. Click on the Map tab to open the Map Viewer.
4. Click Add from the left menu, select Add layer from file.

5. Choose the file from your device, click Open, click Create and add to map.

6. From the left menu, click Save and open, then Save as.

7. Fill out the title and click Save.

8. The project is now successfully transferred and saved in your ArcGIS Online public account.
Learning More
If you are interested in learning more about preserving GIS projects, transferring data from ArcGIS Online, or continuing your mapping projects using free GIS tools, consider exploring the following resources:
- The Map & Data Library offers tutorials for QGIS, a free and open-source GIS software available for everyone.
- You can download publicly shared data in shapefile format from ArcGIS Online to your local machine for use in other GIS platforms.
- Contact the Map & Data Library for further assistance at mdl@library.utoronto.ca.