We are going to work with a different dataset for the next few activities. In order to start augmenting the dataset, we need to do a bit of preparation work first. This activity will showcase some new concepts and features for OpenRefine, as well as get our data ready for the following activities.
The goal of this activity is to create a new project with information about the top 32 English books in Project Gutenberg. You will perform various manipulations, such as reduce the number rows and reverse the author name format, to prepare the dataset for the subsequent activities.
Before you begin, please download the OpenRefine workshop sample datasets, if you have not already.
Note: This data is from an API request to get the top 32 English books from Project Gutenberg (http://www.gutenberg.org/). Information about the API can be found here: https://github.com/garethbjohnson/gutendex. There are other ways to get full lists of books from Project Gutenberg, but the small dataset will work well for the activities.
In this activity, you are going to:
Create a new project from a JSON file of book information and learn about rows vs records
Join multiple cells into one cell to reduce the number of rows
Use some advanced GREL and regex to reverse the author names in our dataset
Create a new project from a JSON file of book information and learn about rows vs records
1. Let’s create a new project. Start up OpenRefine (if it isn’t running) or click on the OpenRefine logo on the top left to go to the main screen.
2. Click on Create Project. Make sure This Computer is highlighted and then browse to the file books.json. Then click on Next.
3. OpenRefine has recognized the data as JSON, but it needs our help to make sense of it. We need to click on the JSON preview to highlight what a complete individual record is within the curly brackets. Hover over the curly brackets just below the words results at the top of the file. That should highlight the lines of JSON that pertain to an individual record. This is an example record to tell OpenRefine how to parse the file. Click on that curly bracket to select it.
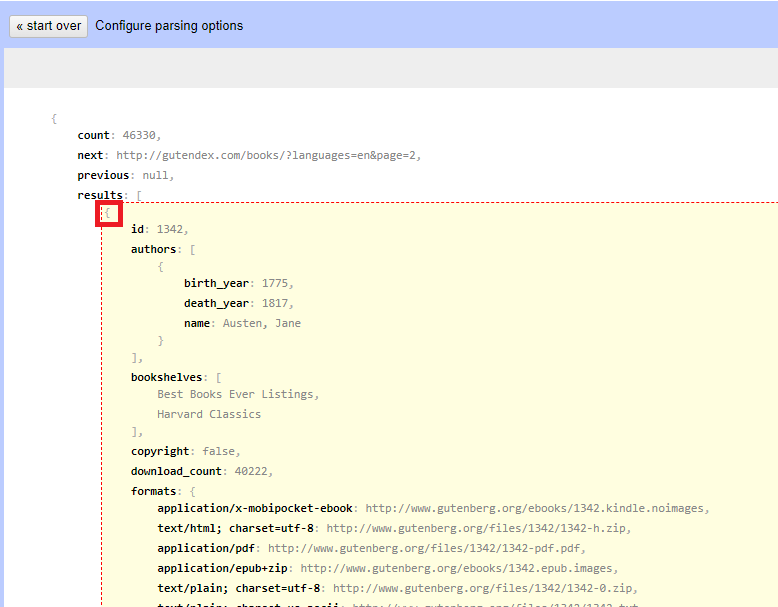
4. You should now see a preview screen that shows you all the records in the file, nicely laid out with rows and columns. It has some information on book titles and their authors, subjects and bookshelf categories, and a lot of links to images and text related to the book on Project Gutenberg.

If that is what you see, then give your project a name at the top and click on Create Project.
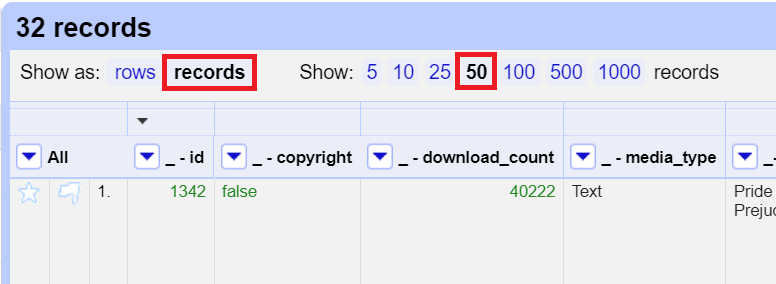
5. In the workshop, our examples have had the same number of rows and records, so we haven’t discussed the distinction yet, but in this case, we have a different number. To see this, you can toggle back and forth by clicking on the rows and records links at the top.
There should be 32 records and 178 rows. Records can have one or more related rows in them that identify a unique object and share the same first column. In this case, we have 32 records corresponding to 32 books. Each book has multiple rows to provide information on its various subjects, bookshelves and authors. Sometimes it is useful to keep your data in multiple rows, grouped by records, to have these different elements to facet or to use to derive new columns. For our example, let’s display it as records and show 50 so that we can view our whole dataset on one page.
Join multiple cells into one cell to reduce the number of rows
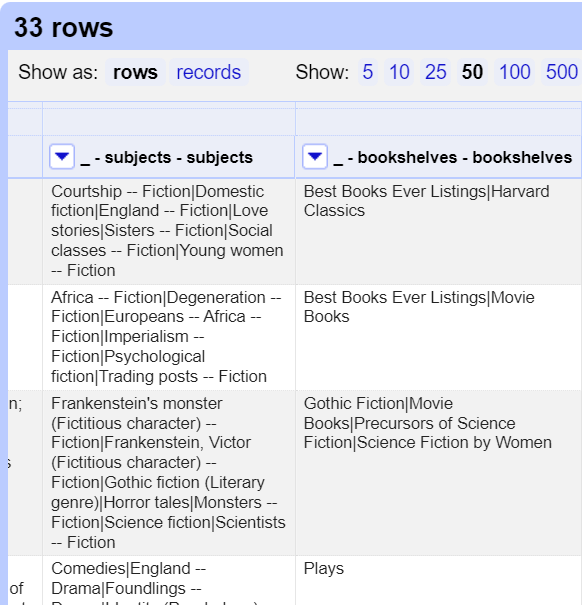
6. Let’s keep multiple rows where there are multiple authors (there is one record like this), but let’s combine all the cells into one cell for subjects and bookshelves. From the subjects column pull down menu, select edit cells > join multi-valued cells….

Use “ | “ (i.e. space, pipe symbol, space) as the separator and click on OK.

Do the same thing for the bookshelves column. Now, some of the rows have been combined, with different subjects and bookshelves separated by a space, pipe symbol, space.
Use some advanced GREL and regex to reverse the author names in our dataset
7. Next, we need to reverse the author names in our data. Instead of last name, comma, first name, we want it to be first name, space, last name. If there is one name, keep it as one name, and if there is no name, keep it as a blank.
8. There are different ways to accomplish this. We are going to use GREL and regex to do it. We are also going to use facets to help us with this formula.
9. Before we begin, we need to rename the author name column because we will need to refer to it later. From the _ - authors - _ - name column pull down menu, select edit column > rename this column. Rename it to "author".

10. Next, if you look at our author column, you will see that for some entries there is no author and for others there is only a one name author. For those, we don’t need to make any changes. So let’s remove them from our list through a custom facet. Let’s say that we only want names that have a comma in them (to indicate that there is a first name and a last name). From the author column pull down menu, select facet > custom text facet...
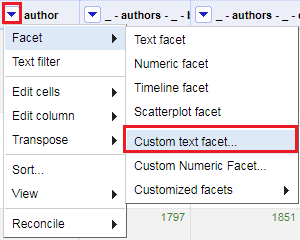
For the expression, type:
value.contains(",").toString()Click on OK.
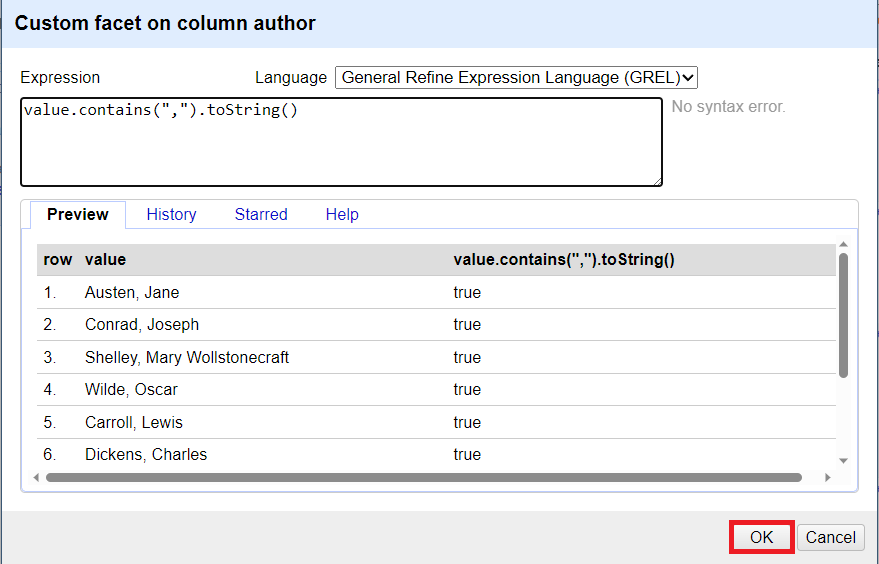
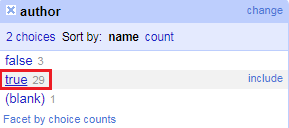
11. This creates a new facet and returns true if the name has a comma, and false if there isn’t one. Select true from the facet box to only show those records. This will focus our next expression only on those names with commas.
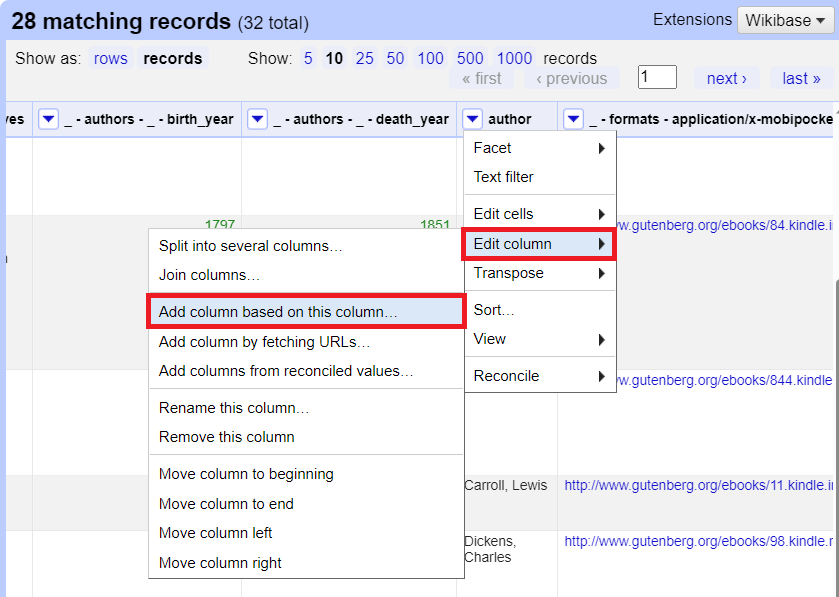
12. Now we write our expression to reverse this subset of names. From the author column pull down menu, select edit column > add column based on this column and give it the name "Full Author Name".
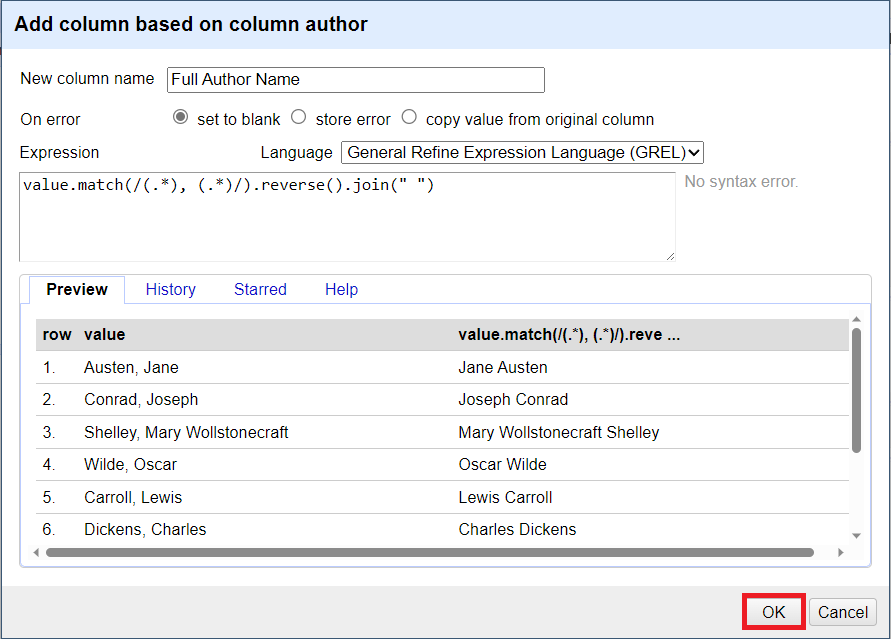
13. Next, we are going to take the two parts around the comma, reverse them, and then join them back together with a space in between. For the expression, we are going to use the function match() instead of partition(), to only find the matches to the regex patterns.
14. For the expression, start by typing:
value.match(/(.*), (.*)/)

The expression in the match function is surrounded by // to signal it is regex. The parentheses indicate that you are going to match a group of characters. The .* expression will match any character 0, 1, or more times. So here we are matching any number of characters, a comma & space, and then another set of any number of characters. This expression should return an array of the two chunks of matching text before and after the comma & space (take a look at the preview to confirm).
15. Next we want to swap them, so we add .reverse(). And then join them back together as a string with a space in between them, so we add .join(“ “). In each step, you should see how it changes in the preview window to guide you. So for the final expression, type:
value.match(/(.*), (.*)/).reverse().join(" ")
16. Now you should see the Full Author Name column populated correctly with the author names reversed. However, the single names still need to be added to the column. So now facet on false instead of true to see only author names with one name. There should be three rows.
17. From the Full Author Name column pull down menu, select edit cells > transform…
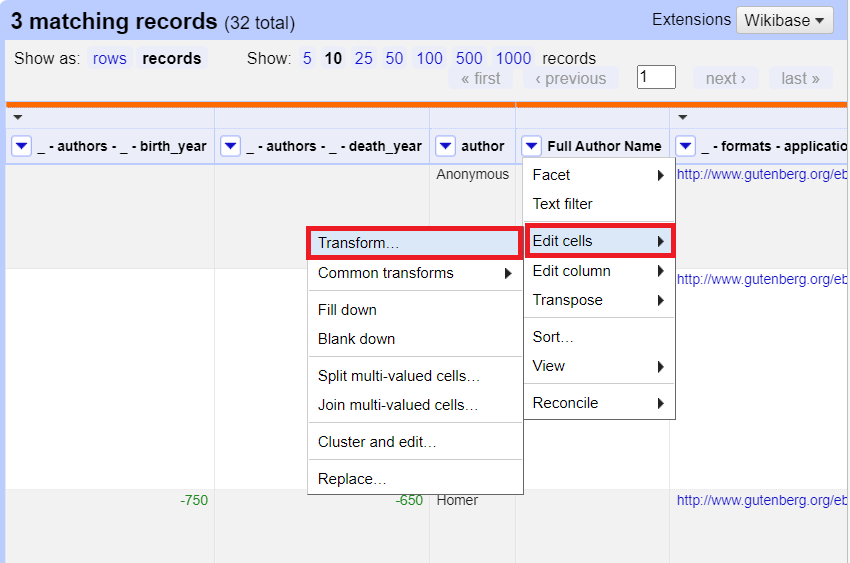
18. For the expression, type:
cells.author.value

Then click on OK. This will copy these author names into the new column, without any changes.
19. Now click on reset for your facet. Your Full Author Name column should be populated correctly with the author names reversed when there are two names, and just a single name, when there is only one.

That’s it! Now your dataset is ready for OpenRefine Augmenting Activity 2: Using Reconciliation Services