Georeferencing is the name given to the process of transforming a scanned map or aerial photograph so it appears “in place” in GIS. By associating features on the scanned image with real world x and y coordinates, the software can progressively warp the image so it fits to other spatial datasets. In this example, a historic Toronto map will be georeferenced using a dataset of city streets so we can see what existed on the site of Robarts Library before it was built.
While it falls under georeferencing in ArcGIS Pro, in ArcGIS Online, it is called a ‘media layer’. It is important to note that media layers are intended for quick visual overlays only, and it is recommended that any more complicated georeferencing be done in ArcGIS Pro. Please see instead our tutorial on georeferencing in ArcGIS Pro.
For a quick overlay of an image however, ‘media layers’ may be what you are looking for.
If you are new to ArcGIS Online, you may also find these tutorials helpful:
Steps:
Adding Media
Repositioning Media
Overlay Manipulation of an Image
Side-by-side Manipulation of an Image
Using the Layer
Saving
Adding Media
1. To add a media layer, all that is required is the image you would like to use. For the purpose of this tutorial, please download the sample scanned map and save it to a location where the files can be used.
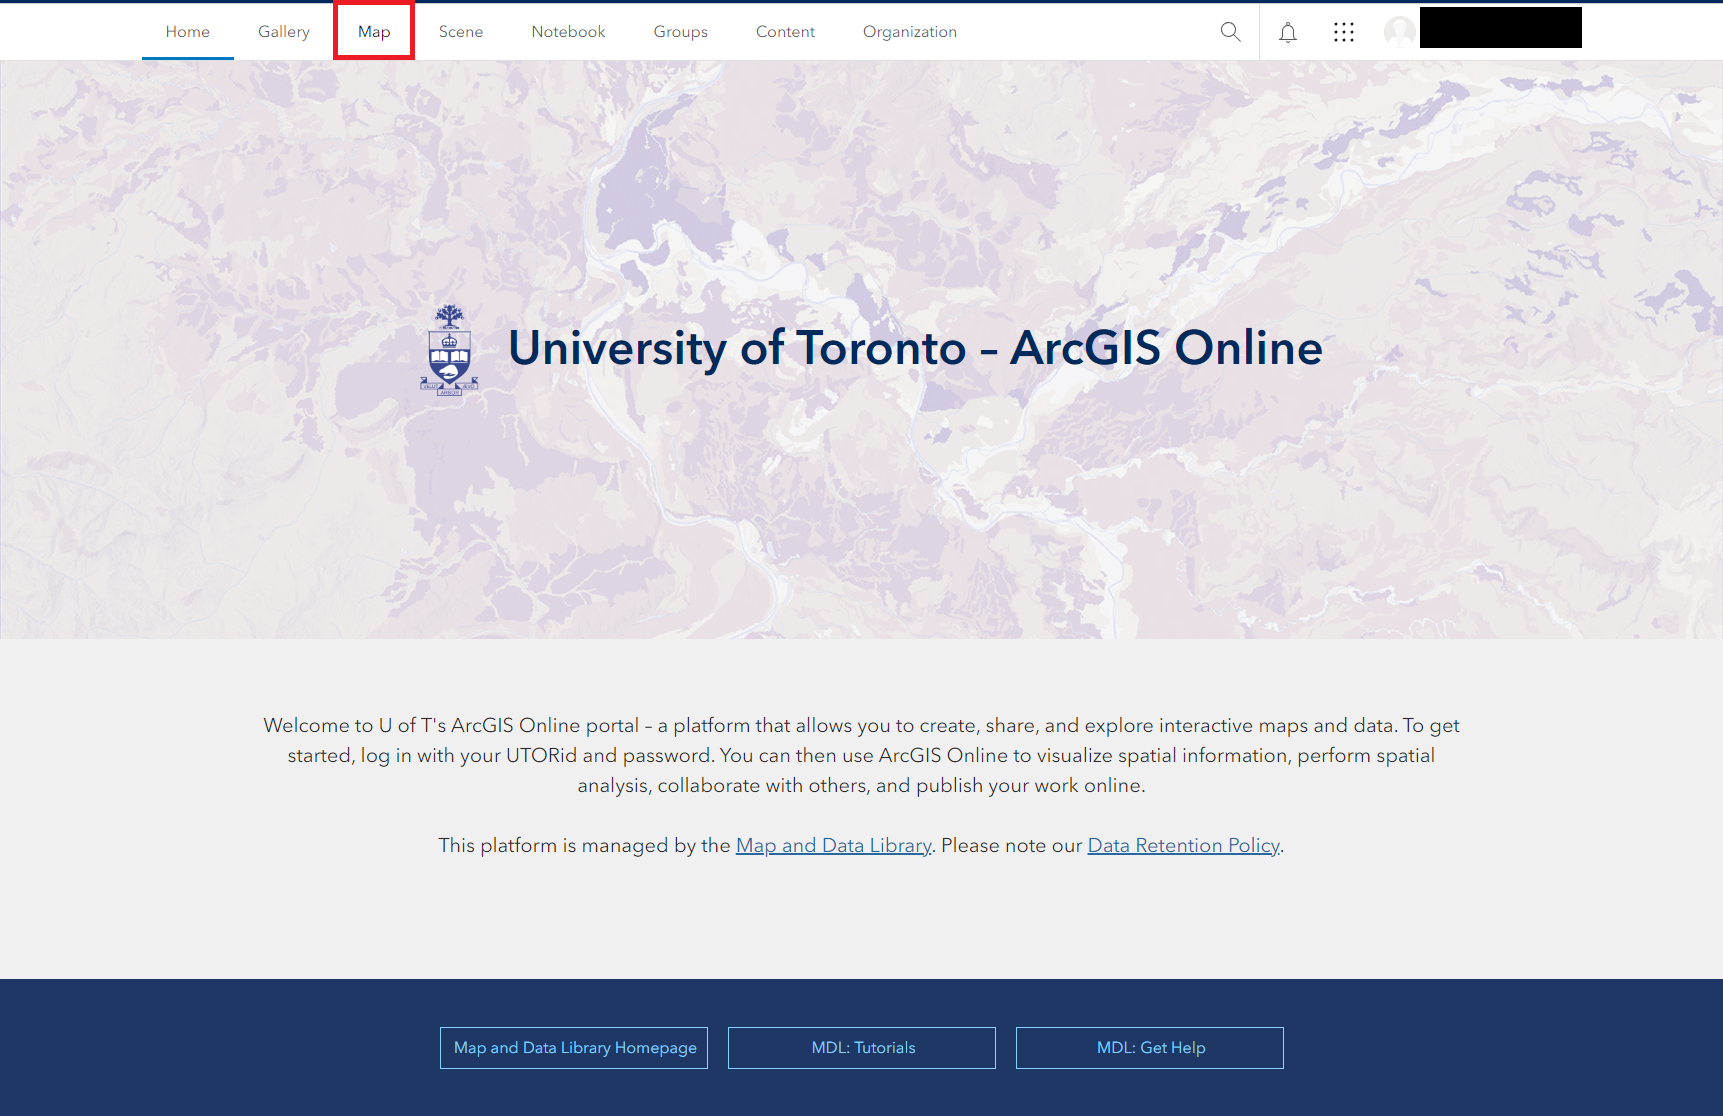
2. To begin, open an untitled map in ArcGIS Online. You can do this by selecting Map from the top menu in ArcGIS Online.
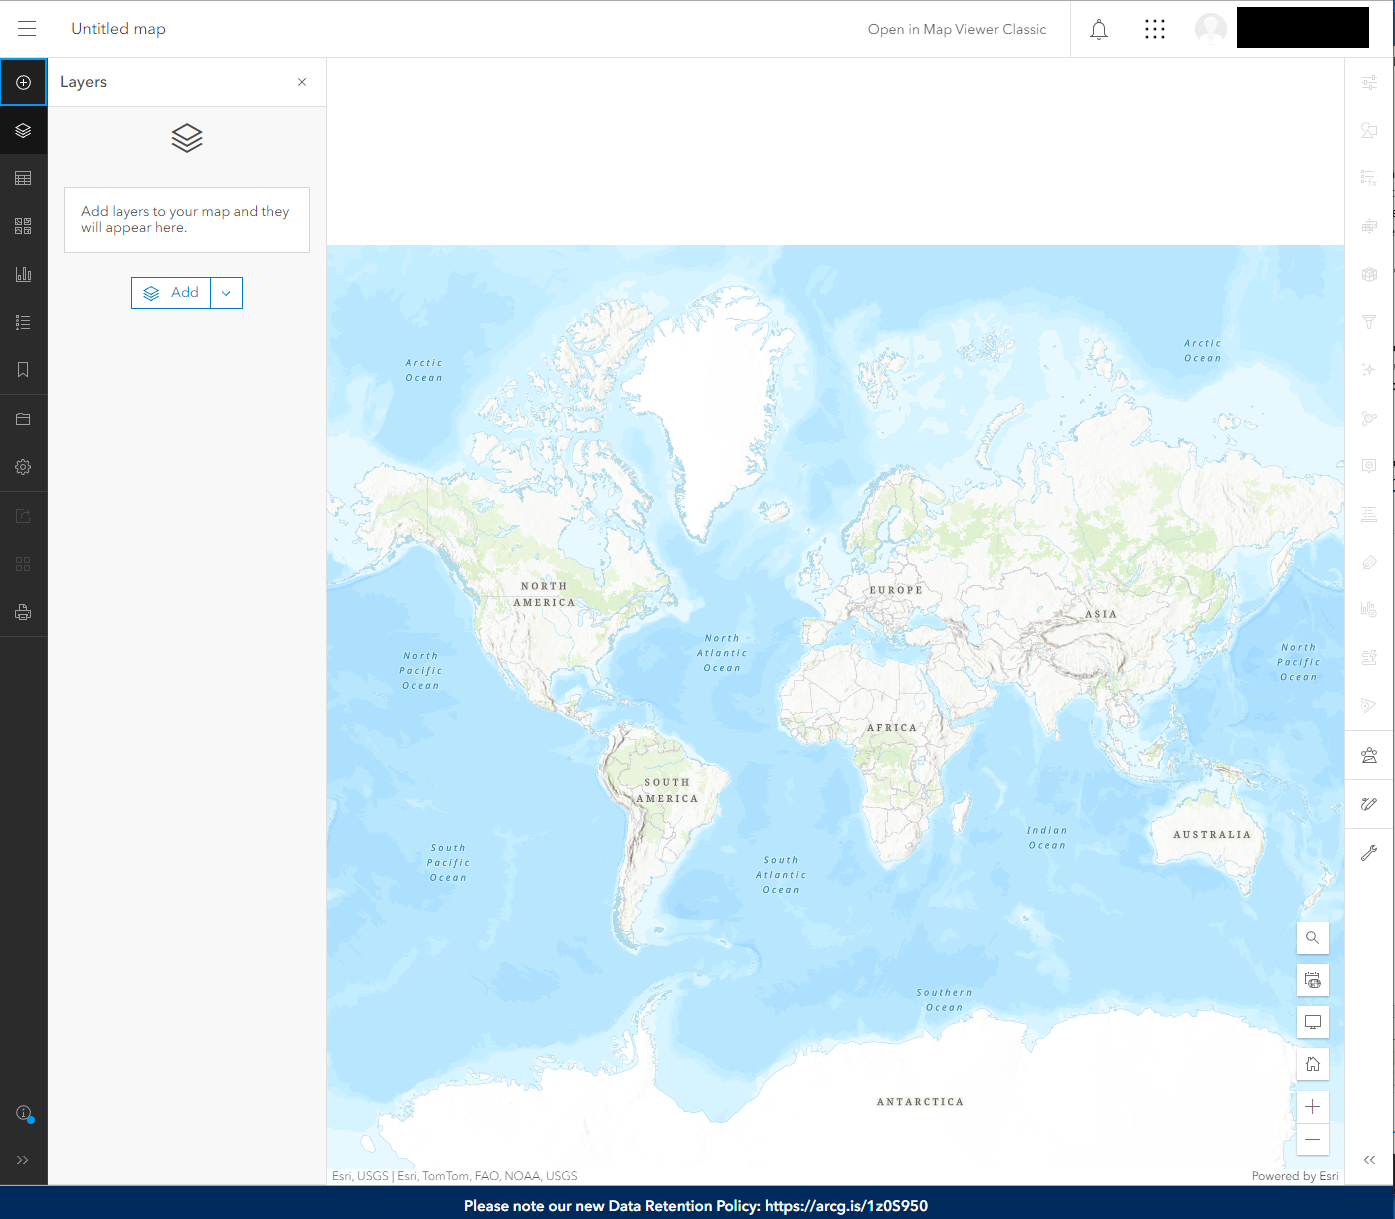
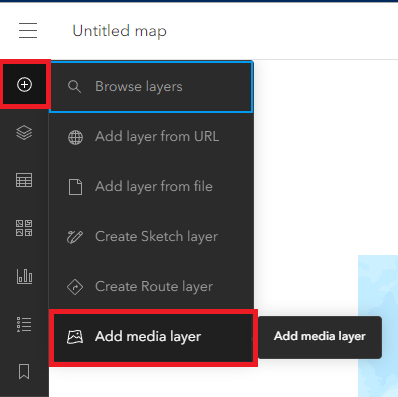
3. From there, select Add > Add media layer. Please note that currently this feature only supports JPG and PNG images smaller than 10MB.
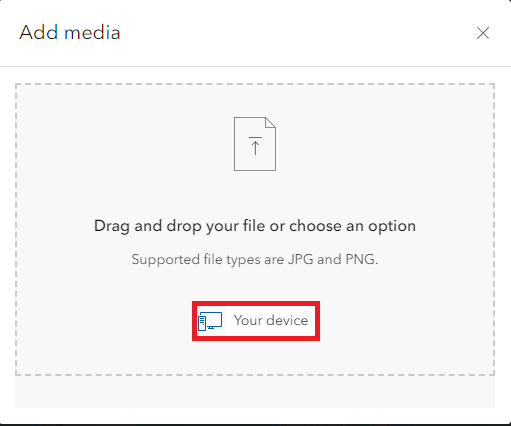
4. You can then select an image from your device, or drag and drop a file. Select Your Device. Navigate to where you saved the image and press Open.
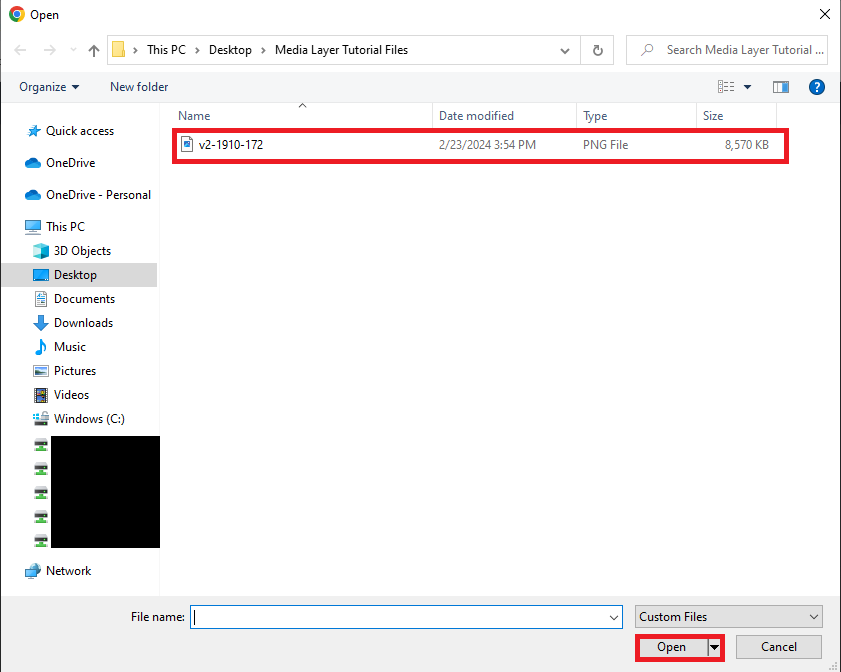
Once you select a file, it will take you to the media layer editor. The image should appear over your map, at 50% transparency.
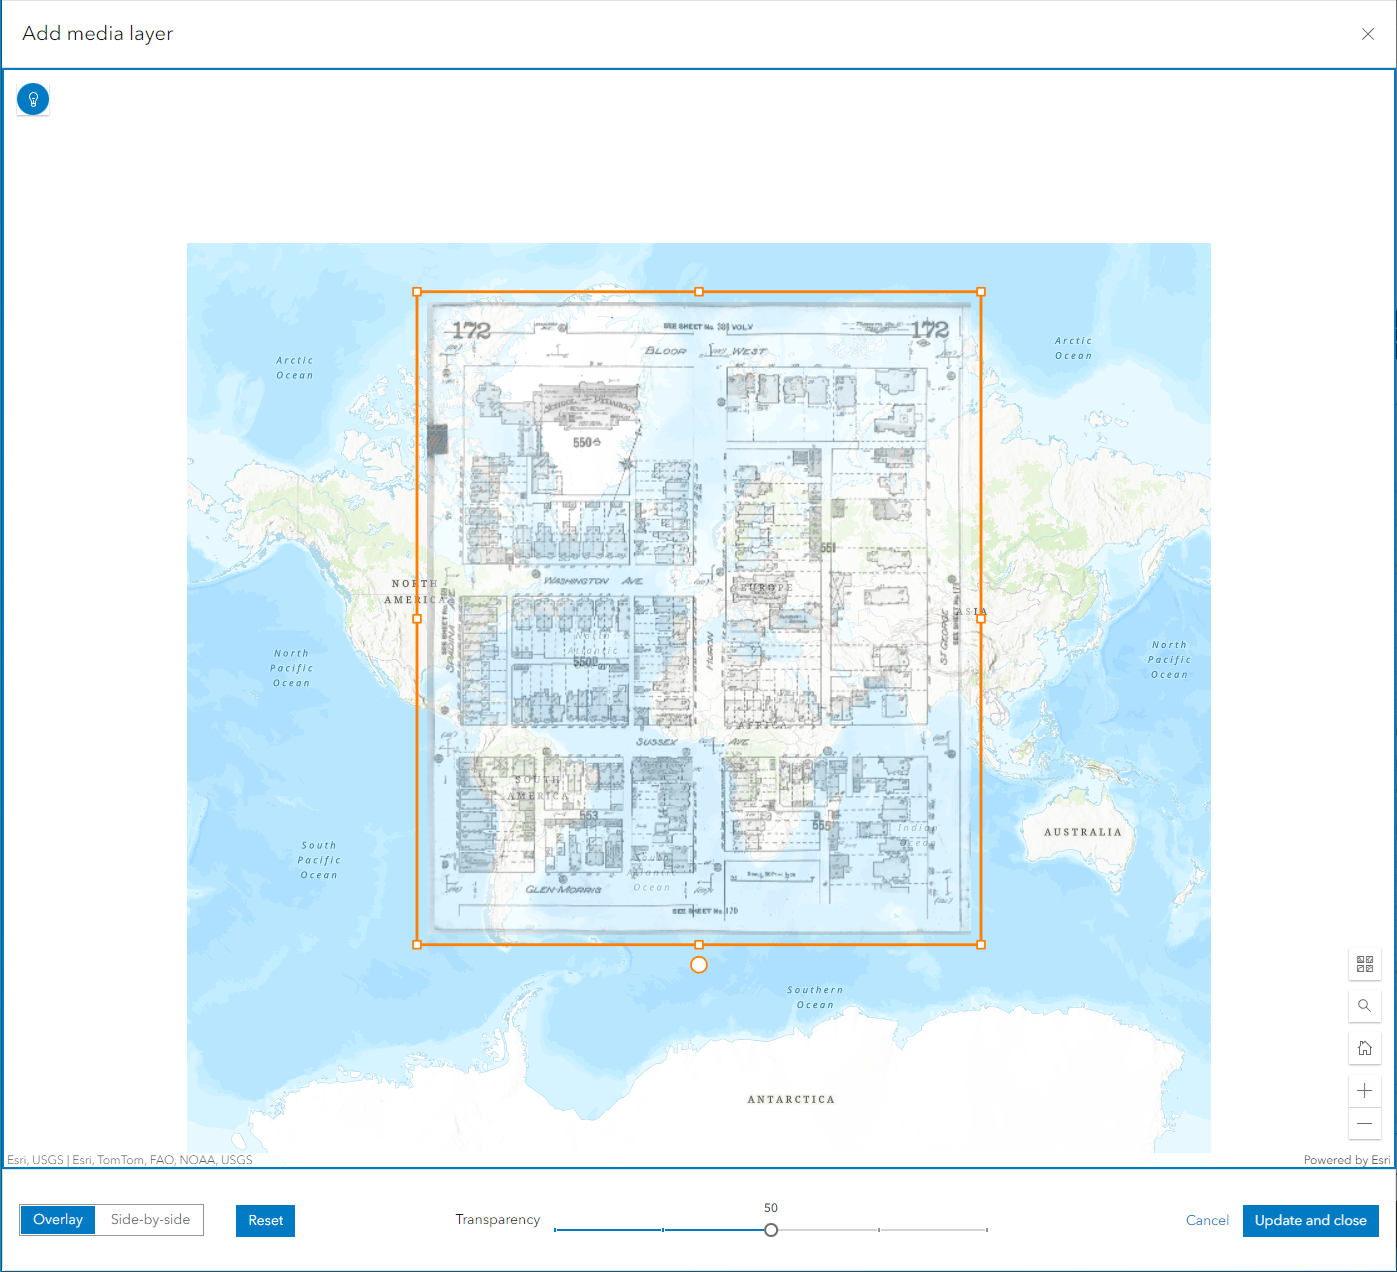
5. Now that the image has been added, we can begin to move and manipulate it.
Repositioning Media
First, let's move it closer to the actual area.
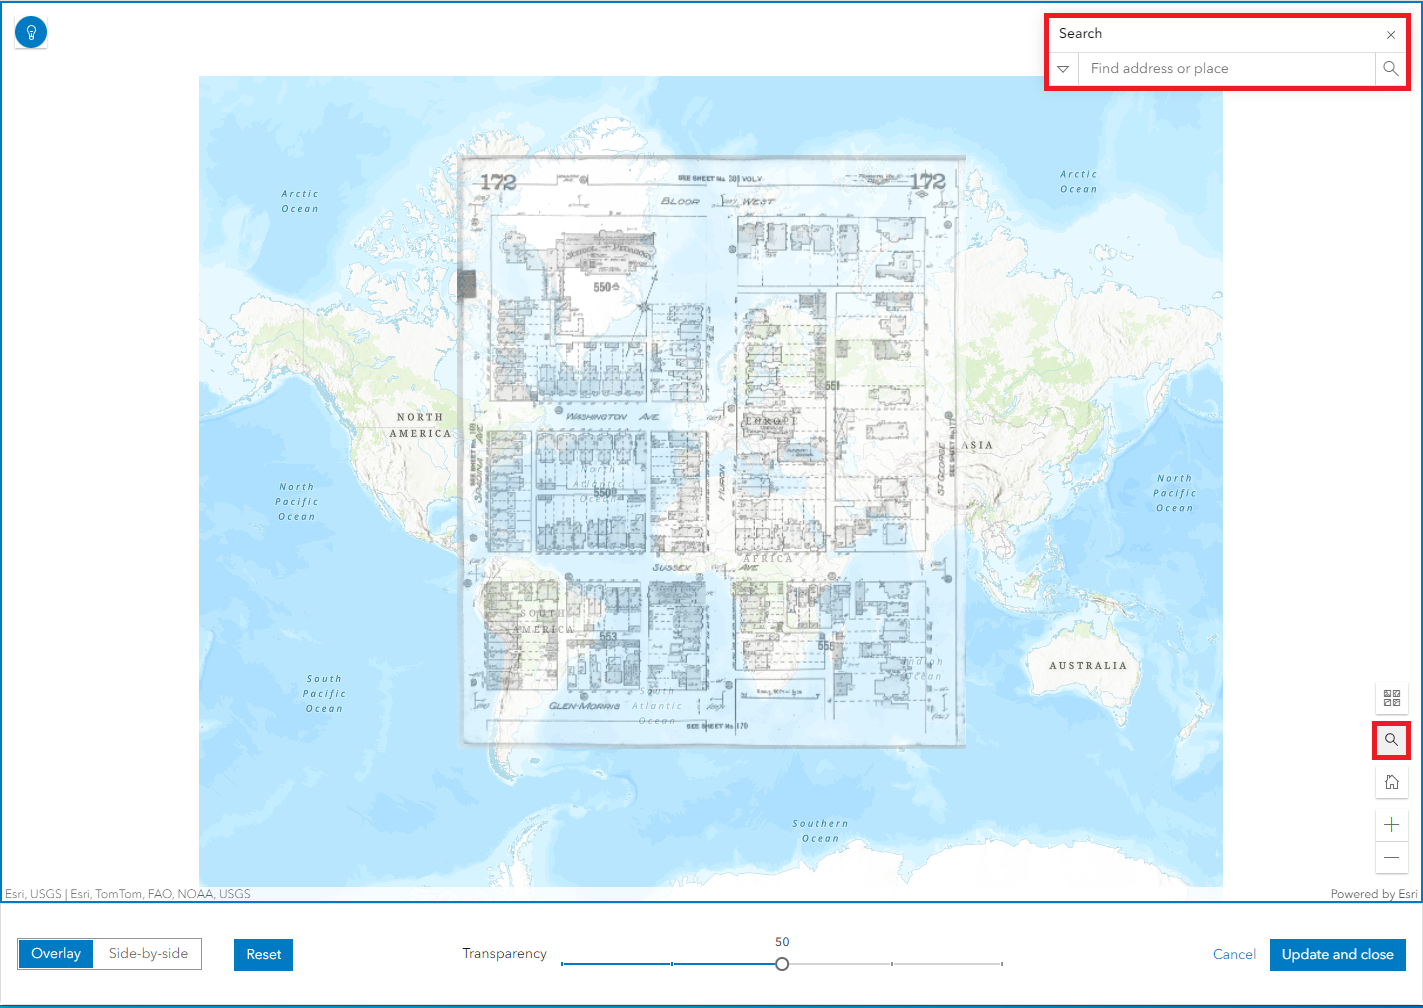
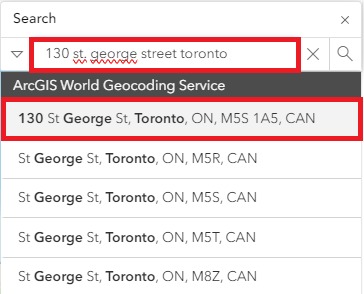
1. To reposition the image closer to the intended site, select the search button. From there, you can input an address. For Robarts, please type: 130 St. George Street Toronto.
The search bar will suggest an address for you. Select the correct one. This will take you to the approximate location of the site.
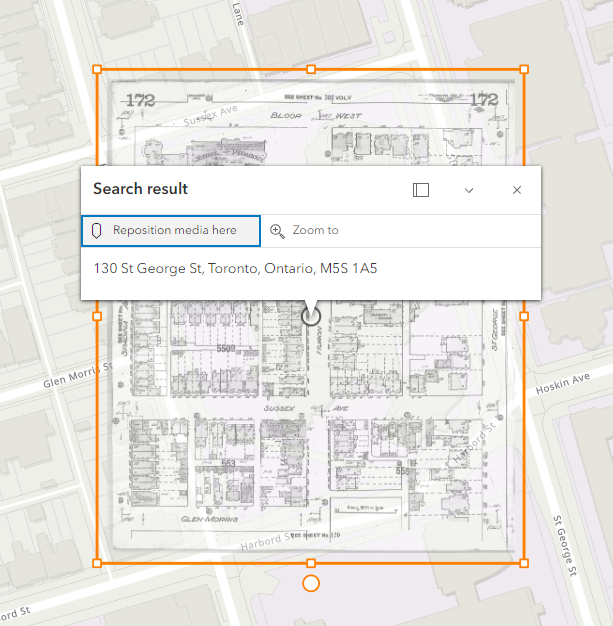
2. In the pop-up, select Reposition media here.
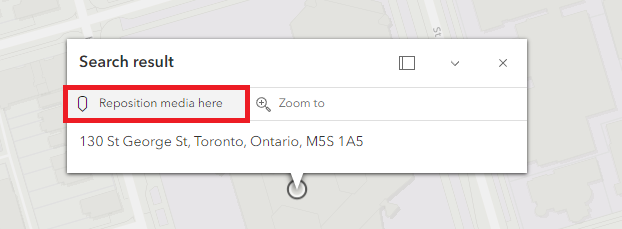
This will resize your image closer to the desired area.
3. If you would like to change your base map, you can select the set of arrows from the bottom right-hand corner. This will then bring up various options.
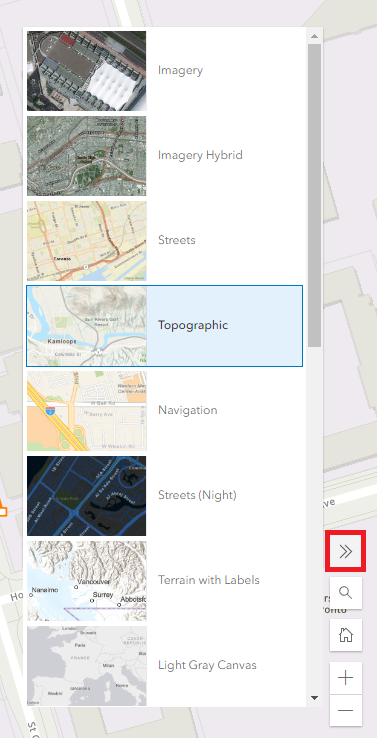
Let's leave the base map for now.
Overlay Manipulation of an Image
1. There are various ways that you can change the image, the first of which is by manually altering the image. When you add the media layer, the map will automatically add it as an overlay image.
2. To scale the image, select any of the orange boxes in the corners to drag the image bigger or smaller. Please note that if you would like to keep the image aspect ratio locked, you must hold shift as you resize the image.
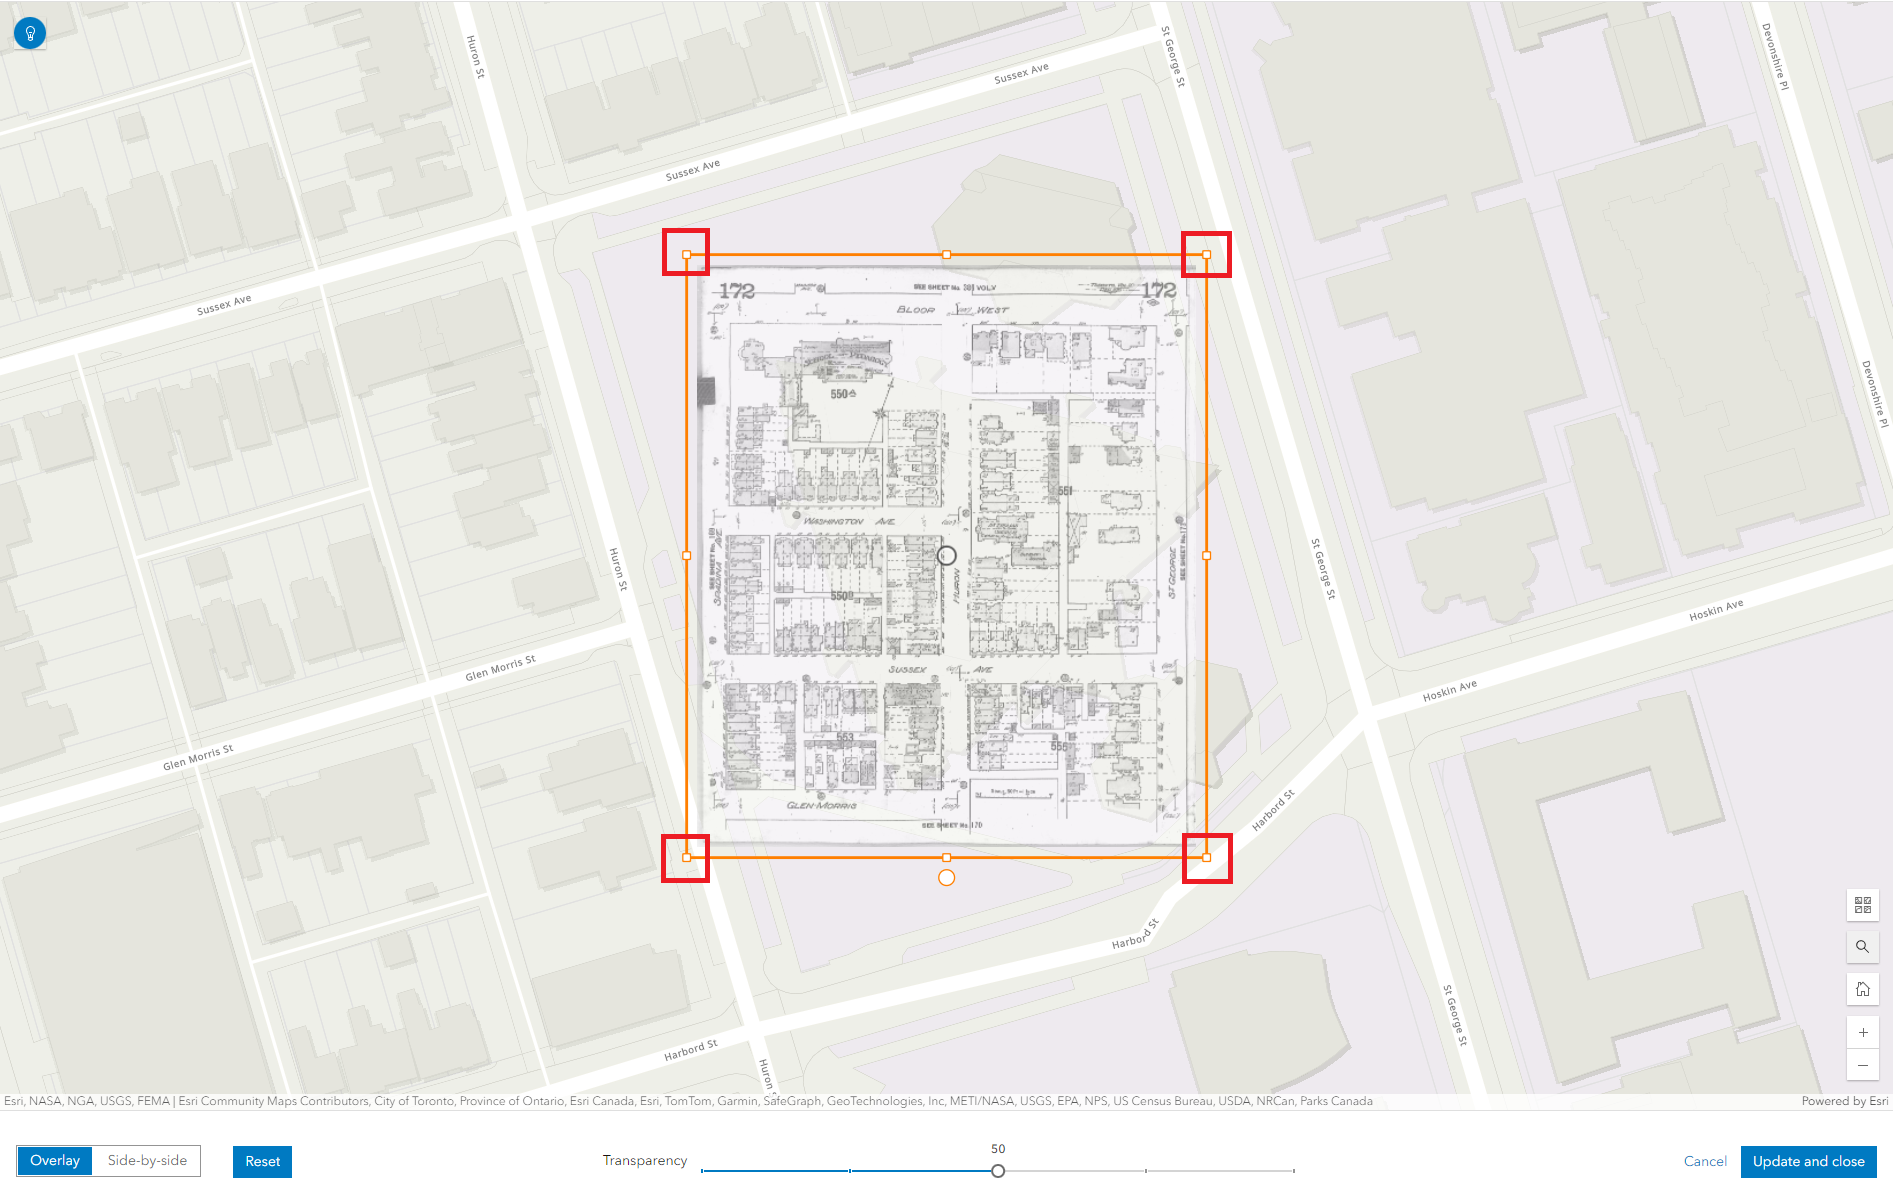
3. To rotate the image, grab and drag the orange circle at the bottom of the image.
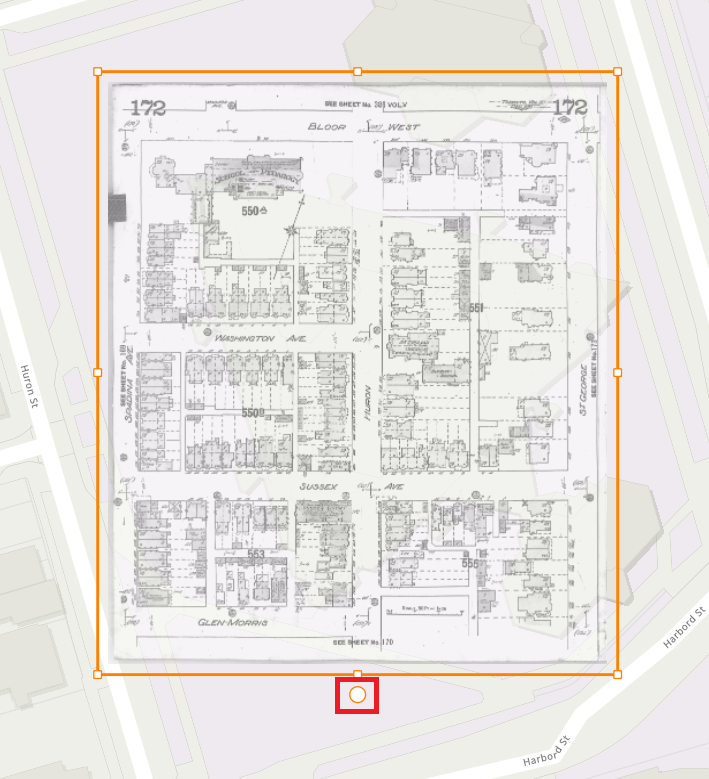
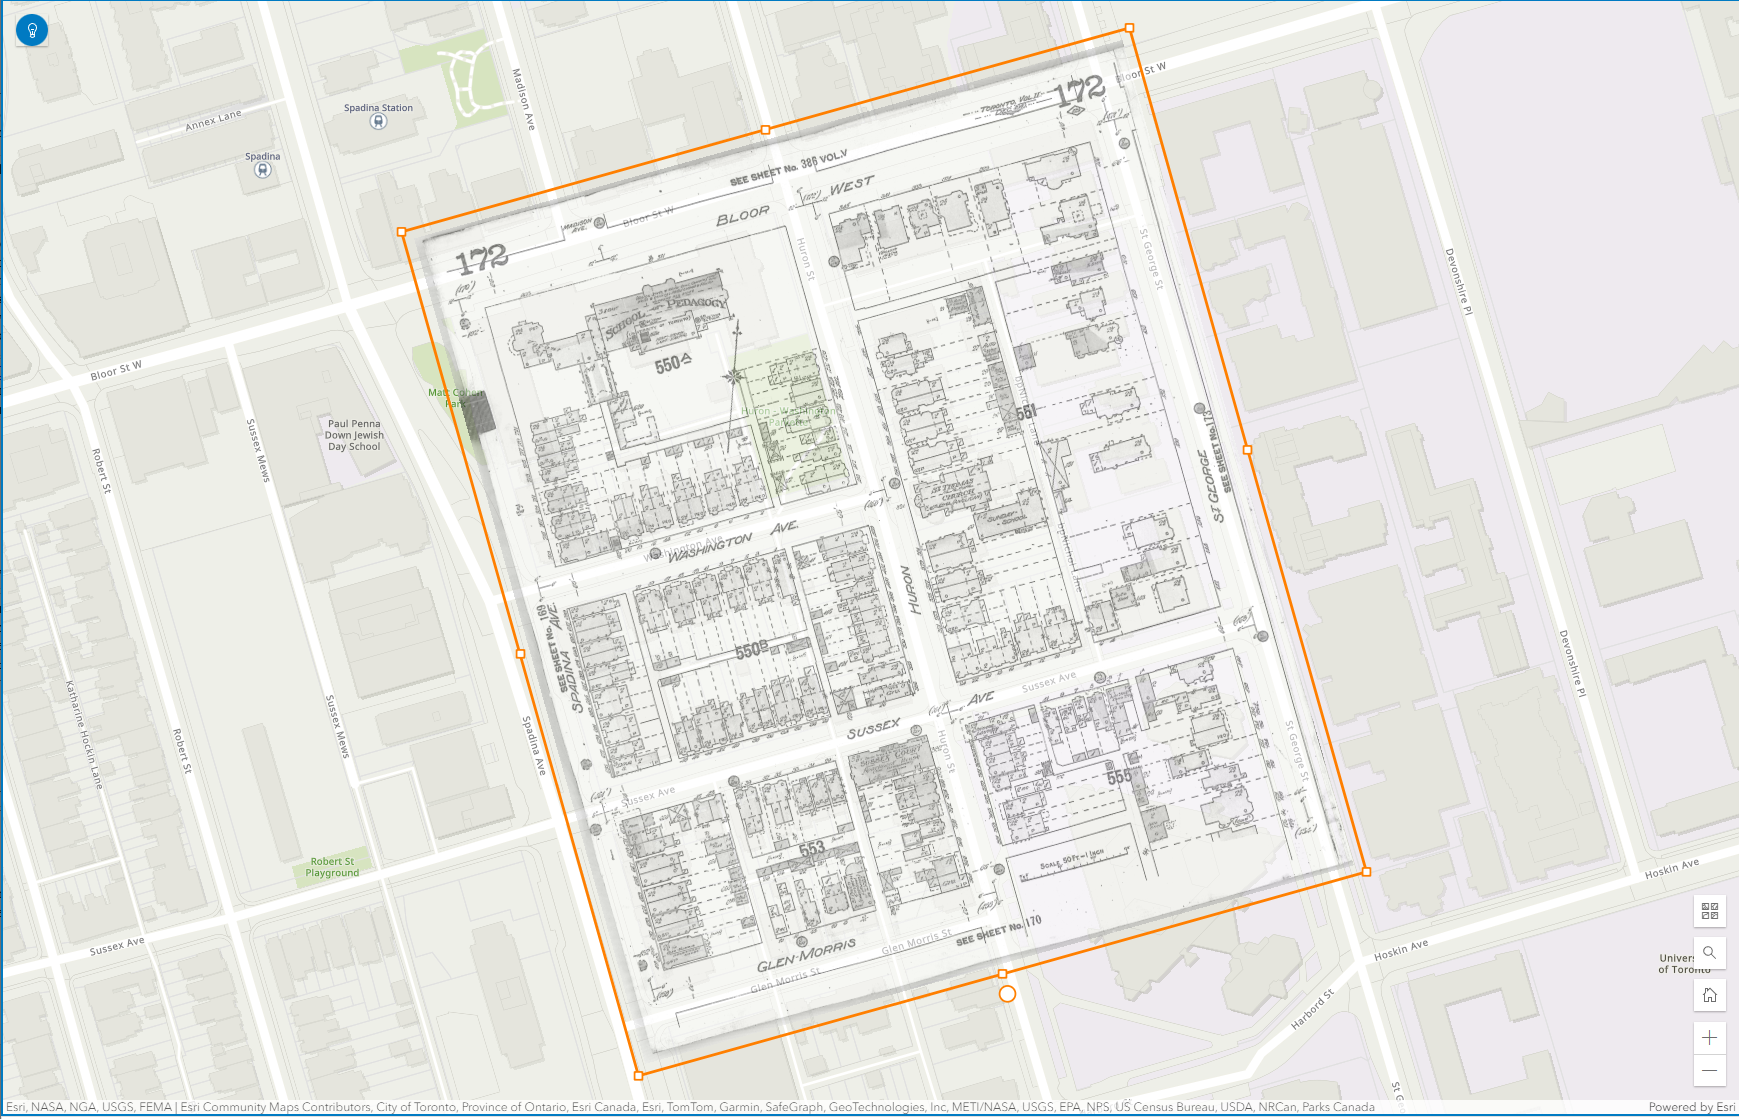
4. From here, you can manually manipulate the image to match up with the map below. When you are done, it should look something like this.
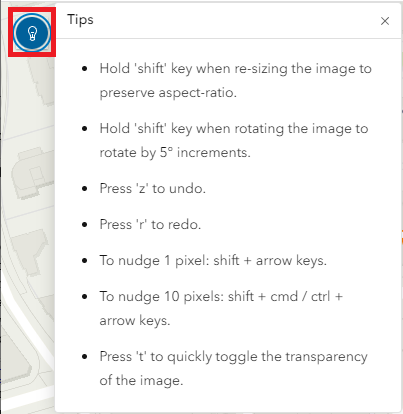
Note: If you want a reminder of shortcuts that are available in the media editor, on the top left-hand side there are a set of tips.
Side-by-side Manipulation of an Image
1. An additional method for using a media layer is to use control points in order to manipulate the map. To begin, please select Side-by-side in order to change the view of the map.
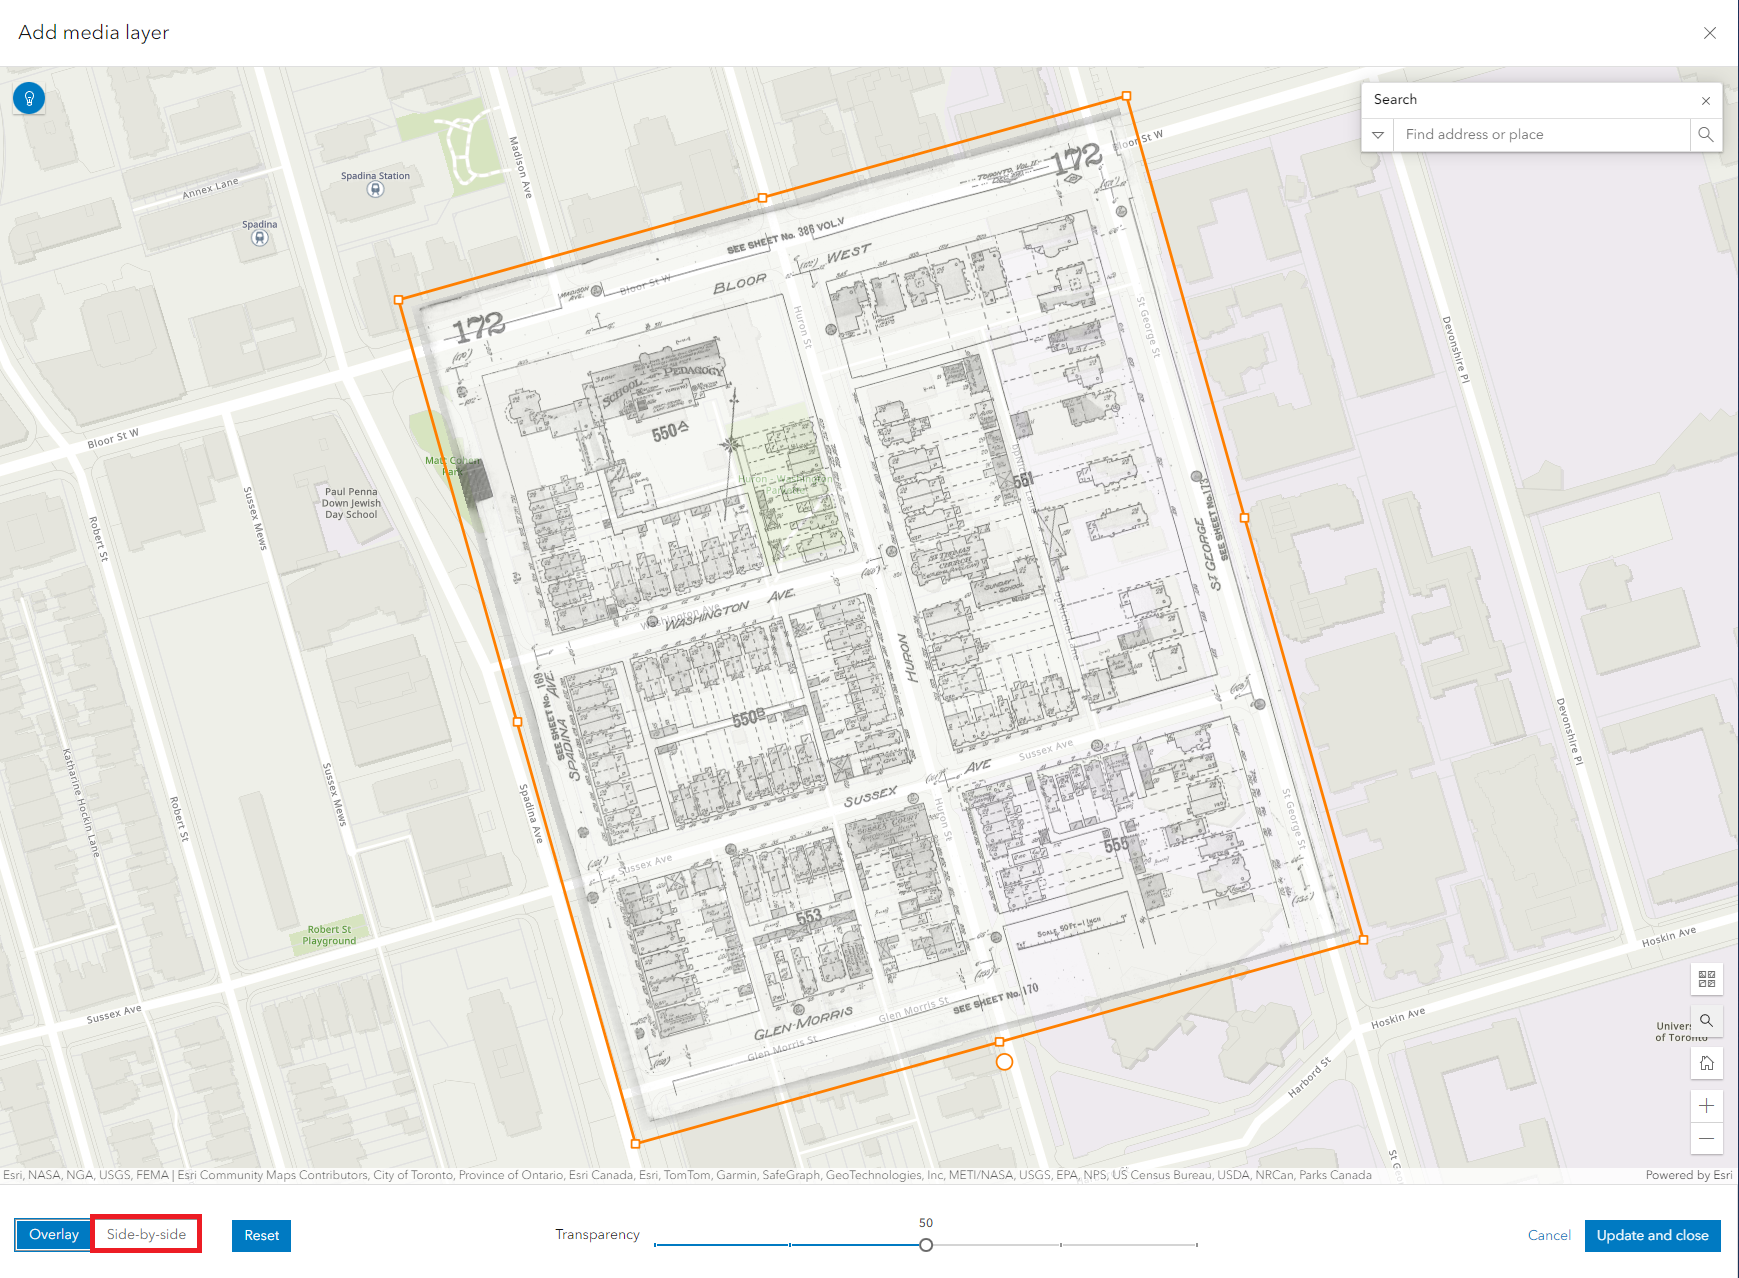
2. The side-by-side view should provide you with the scanned map on the left, and the ArcGIS Online map on the right. Both maps should have four control points that you can then move.
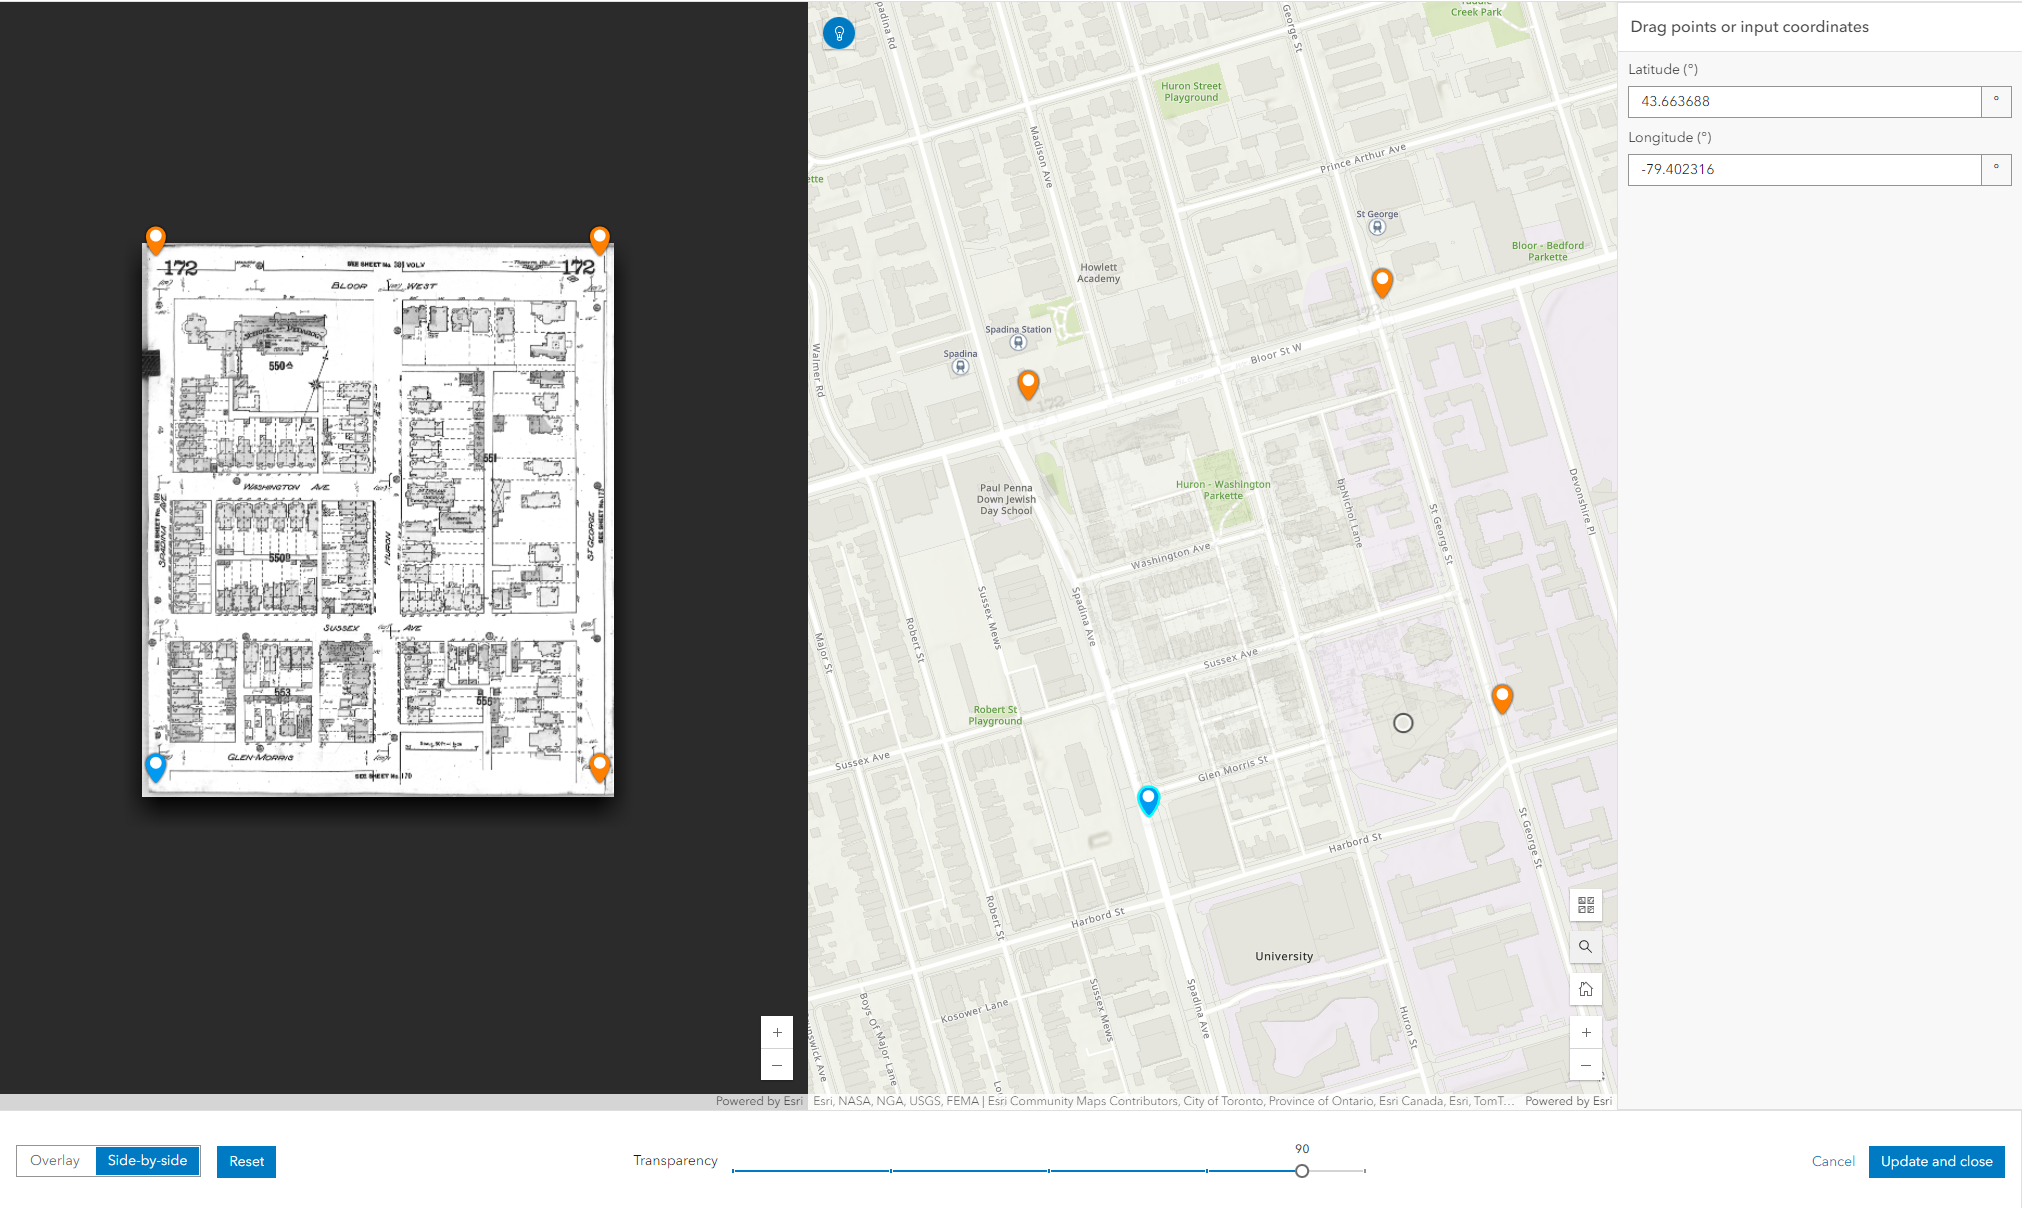
3. Once the maps have loaded, move the control points to line up with the four outer intersections on the map.
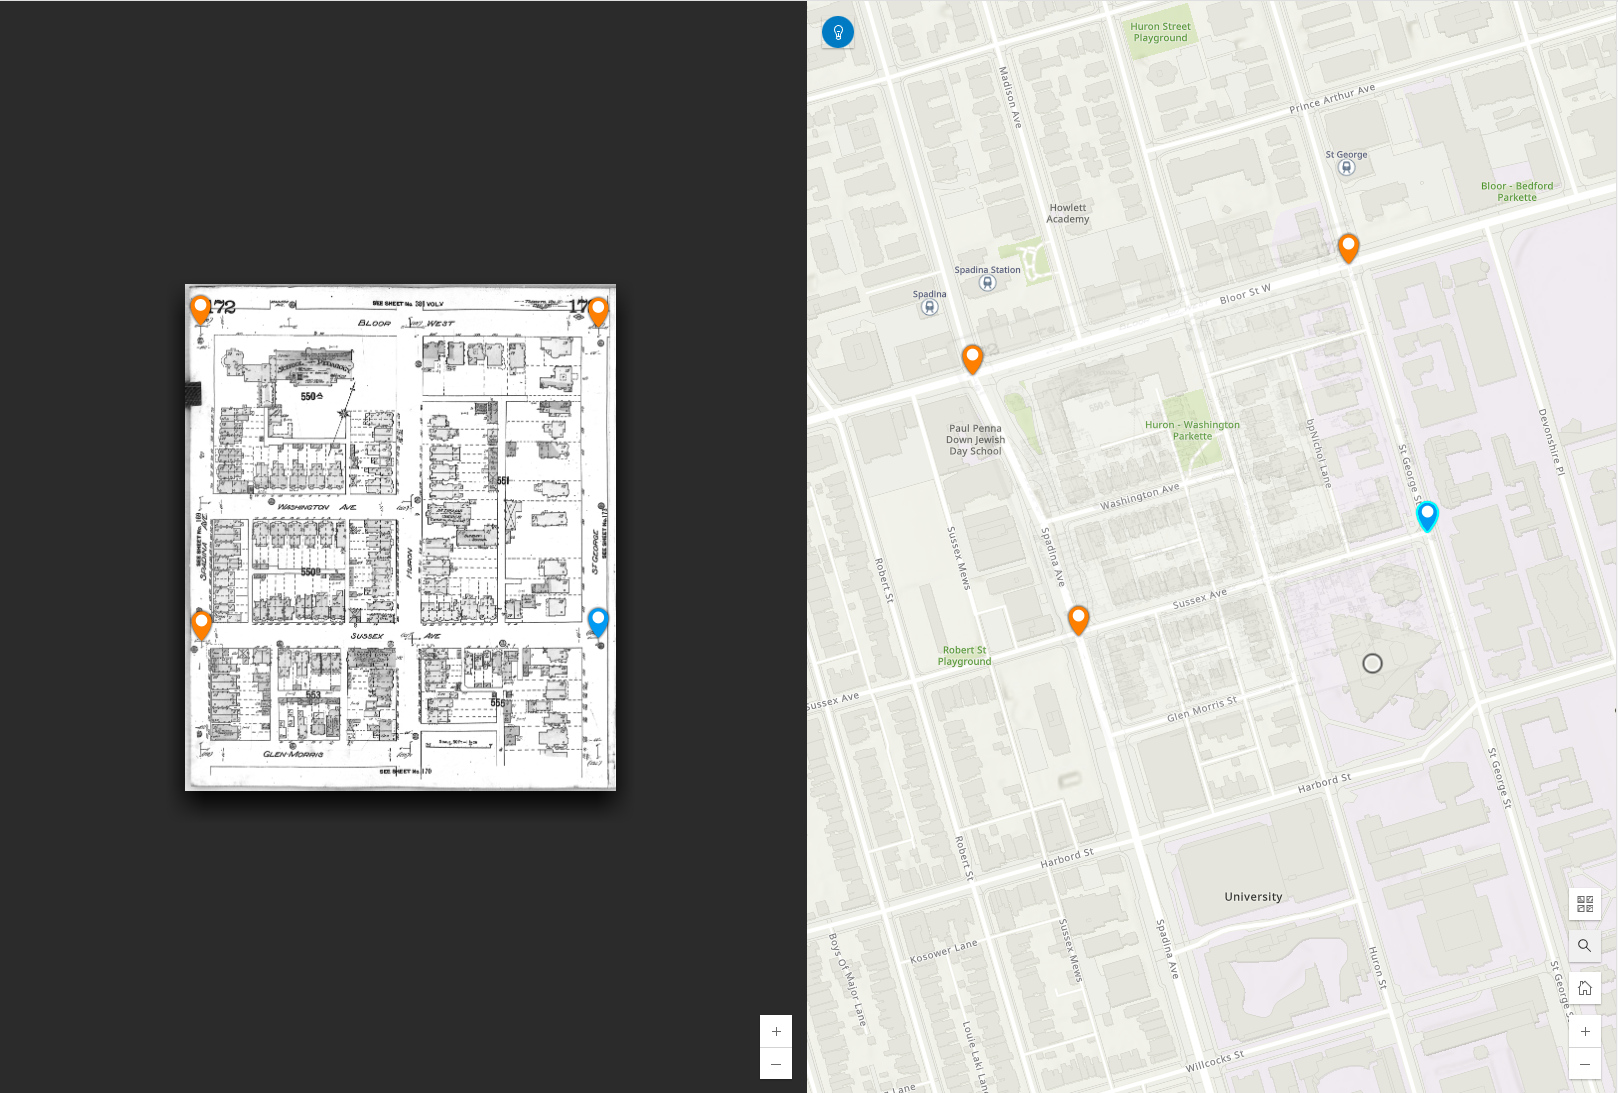
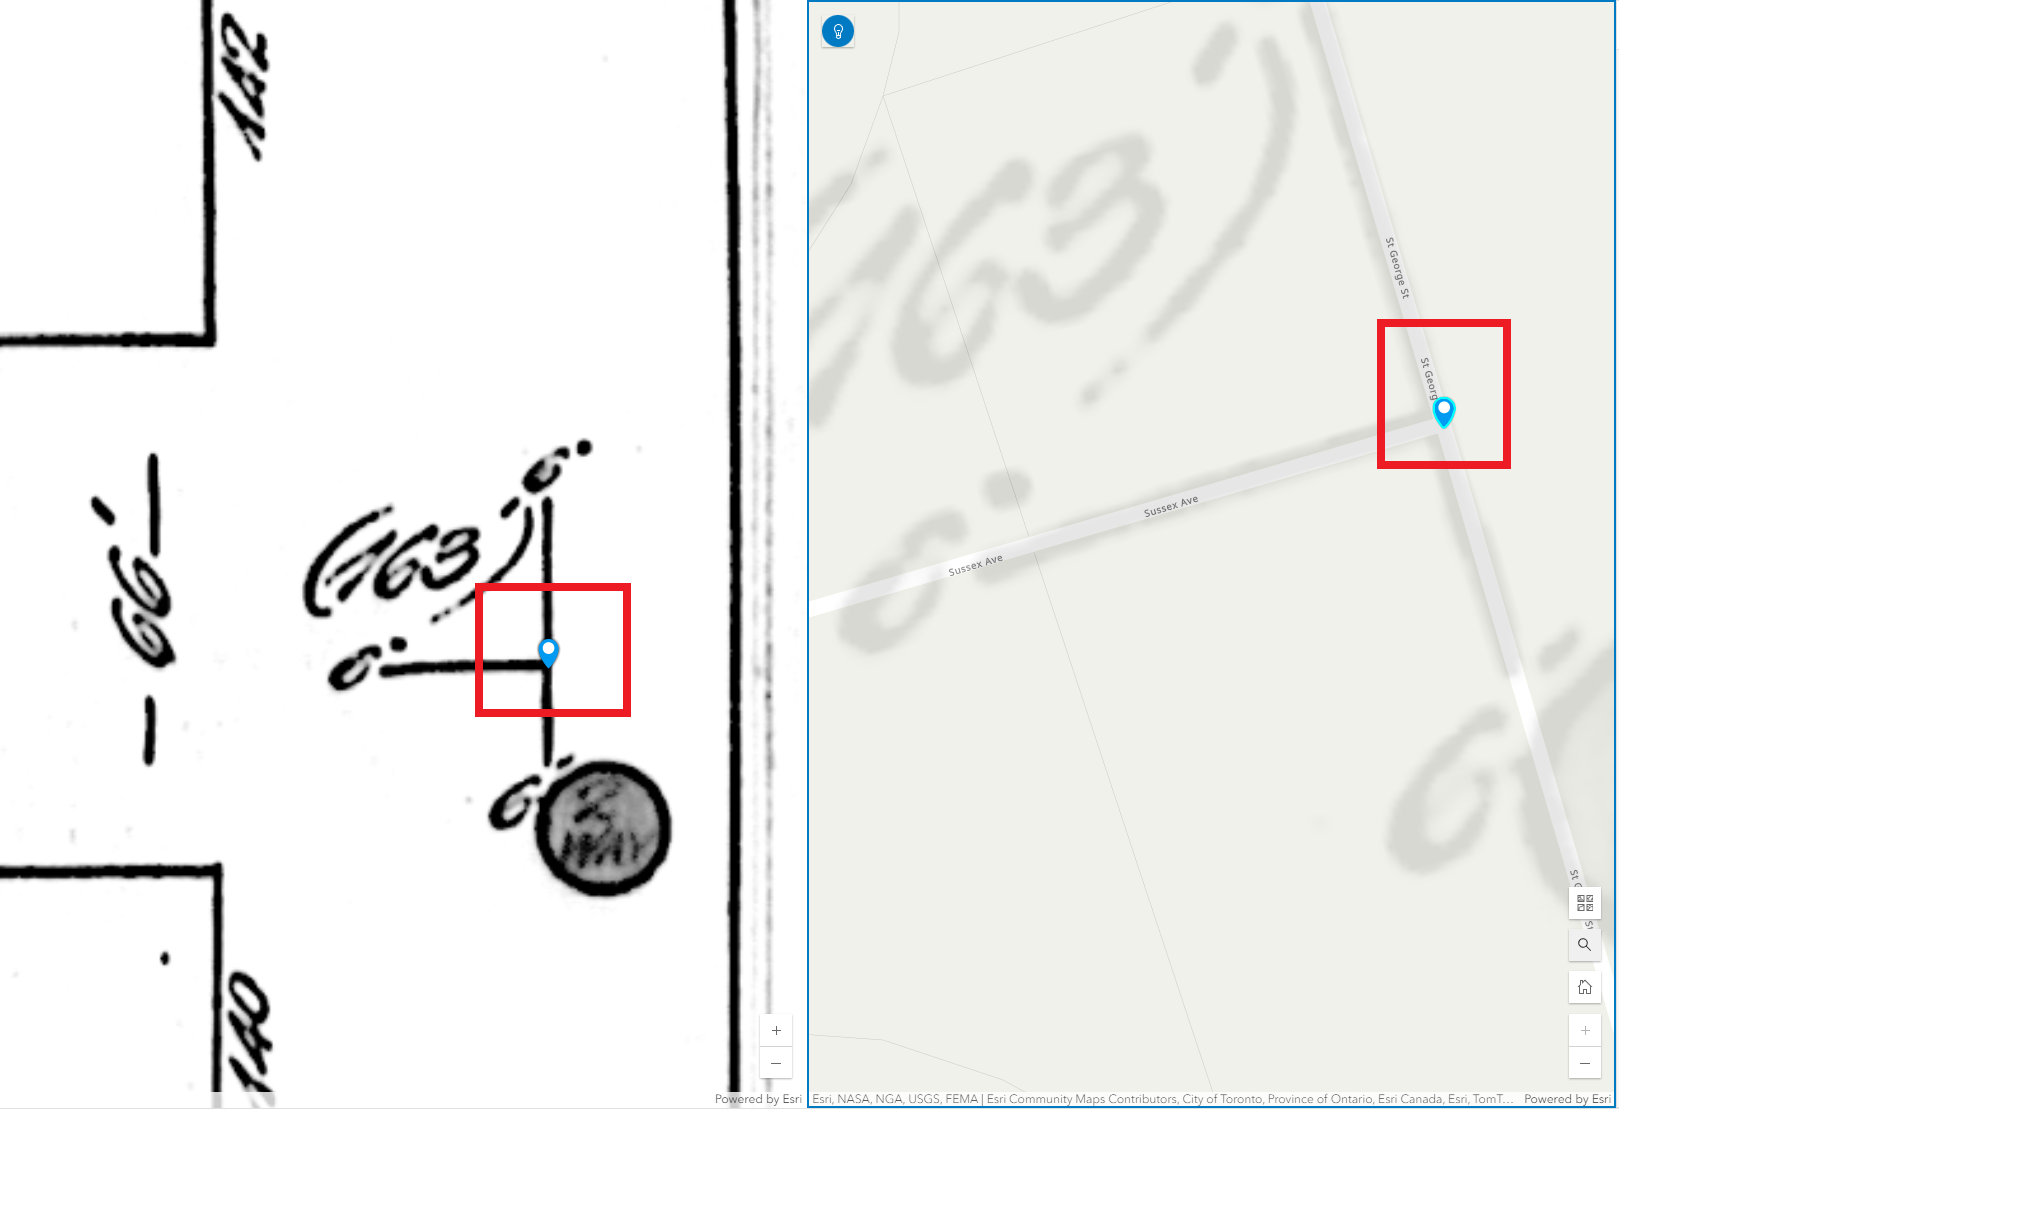
Luckily this image had midpoints on all intersections. We can use them here to more closely line up our map.
4. When you are satisfied with where the image is, select Update and Close in order to save the layer.
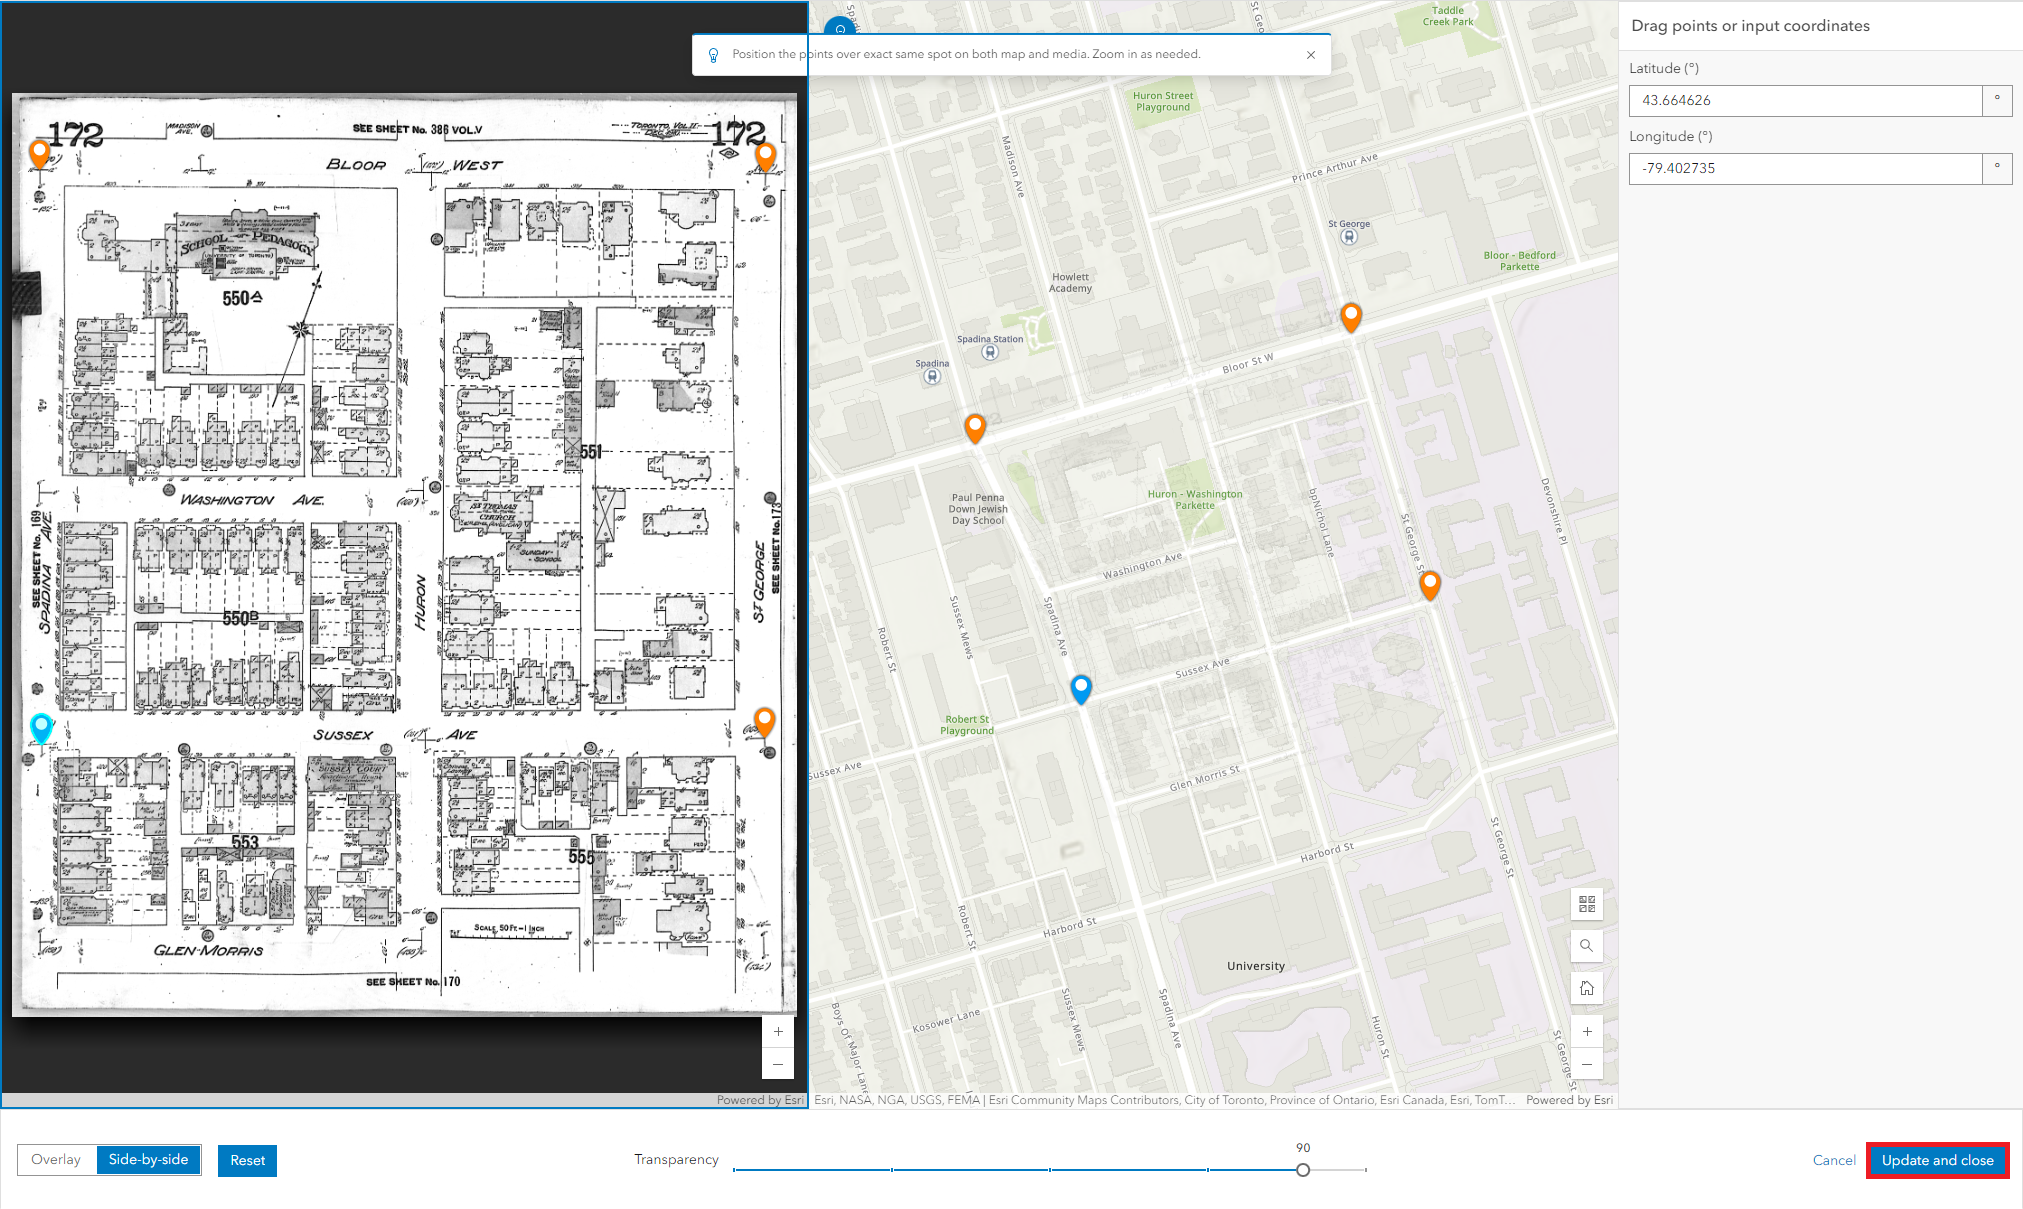
At the end, it should look something like this.
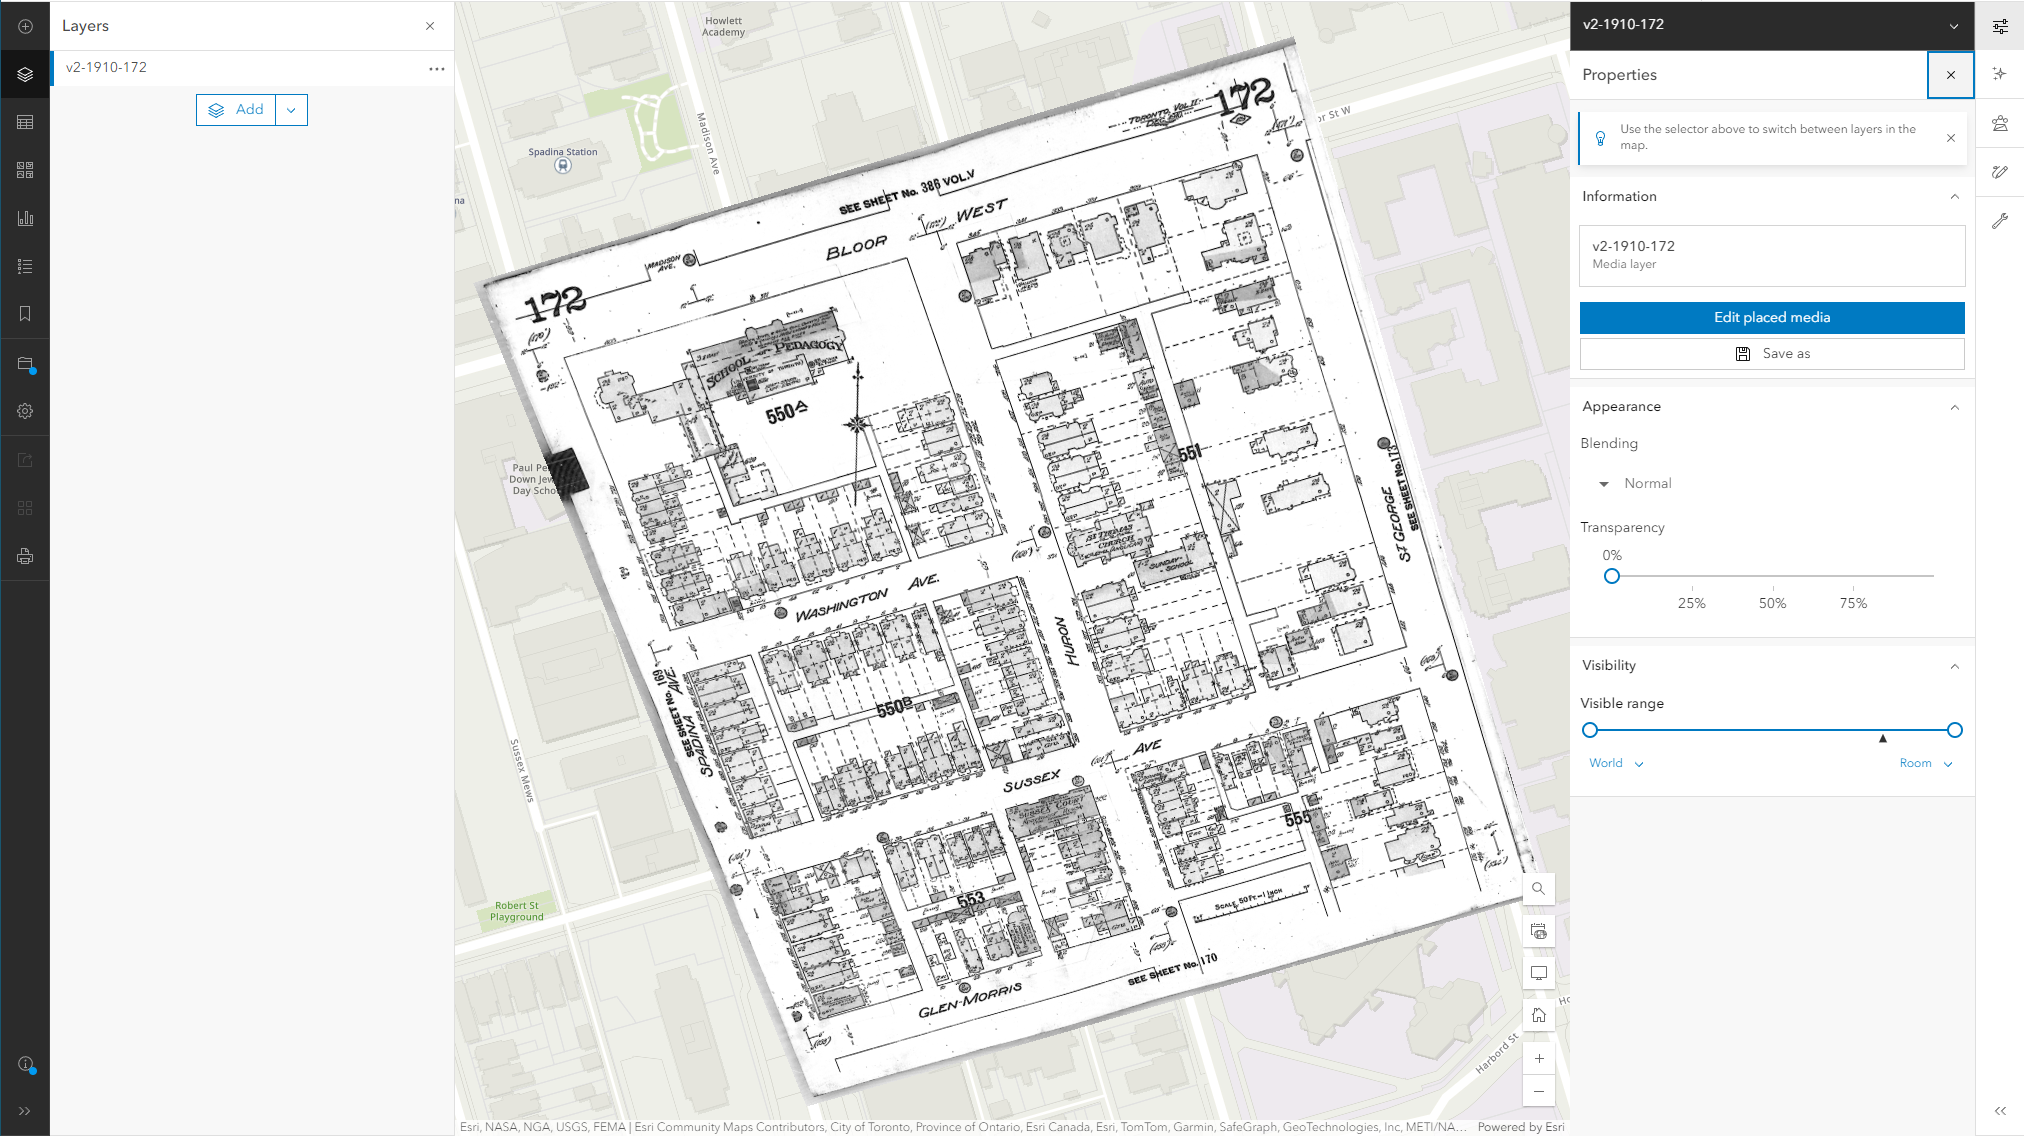
Using the Layer
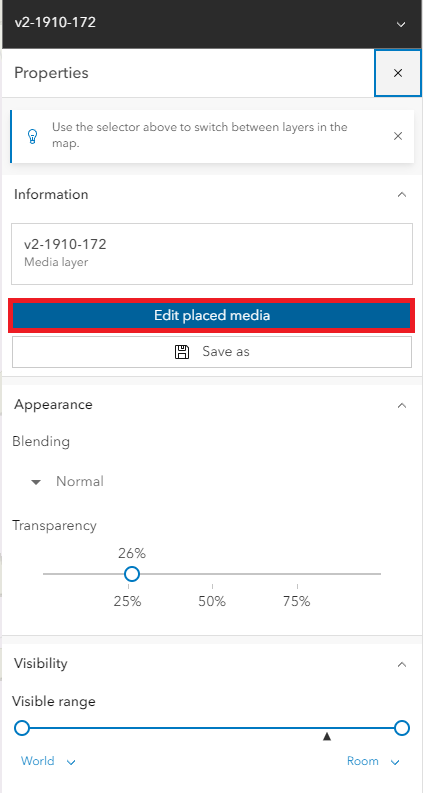
1. If you would like to further edit the layer after updating, you can select Edit Placed Media. It will then take you back to the Overlay/Side-by-side image editor.
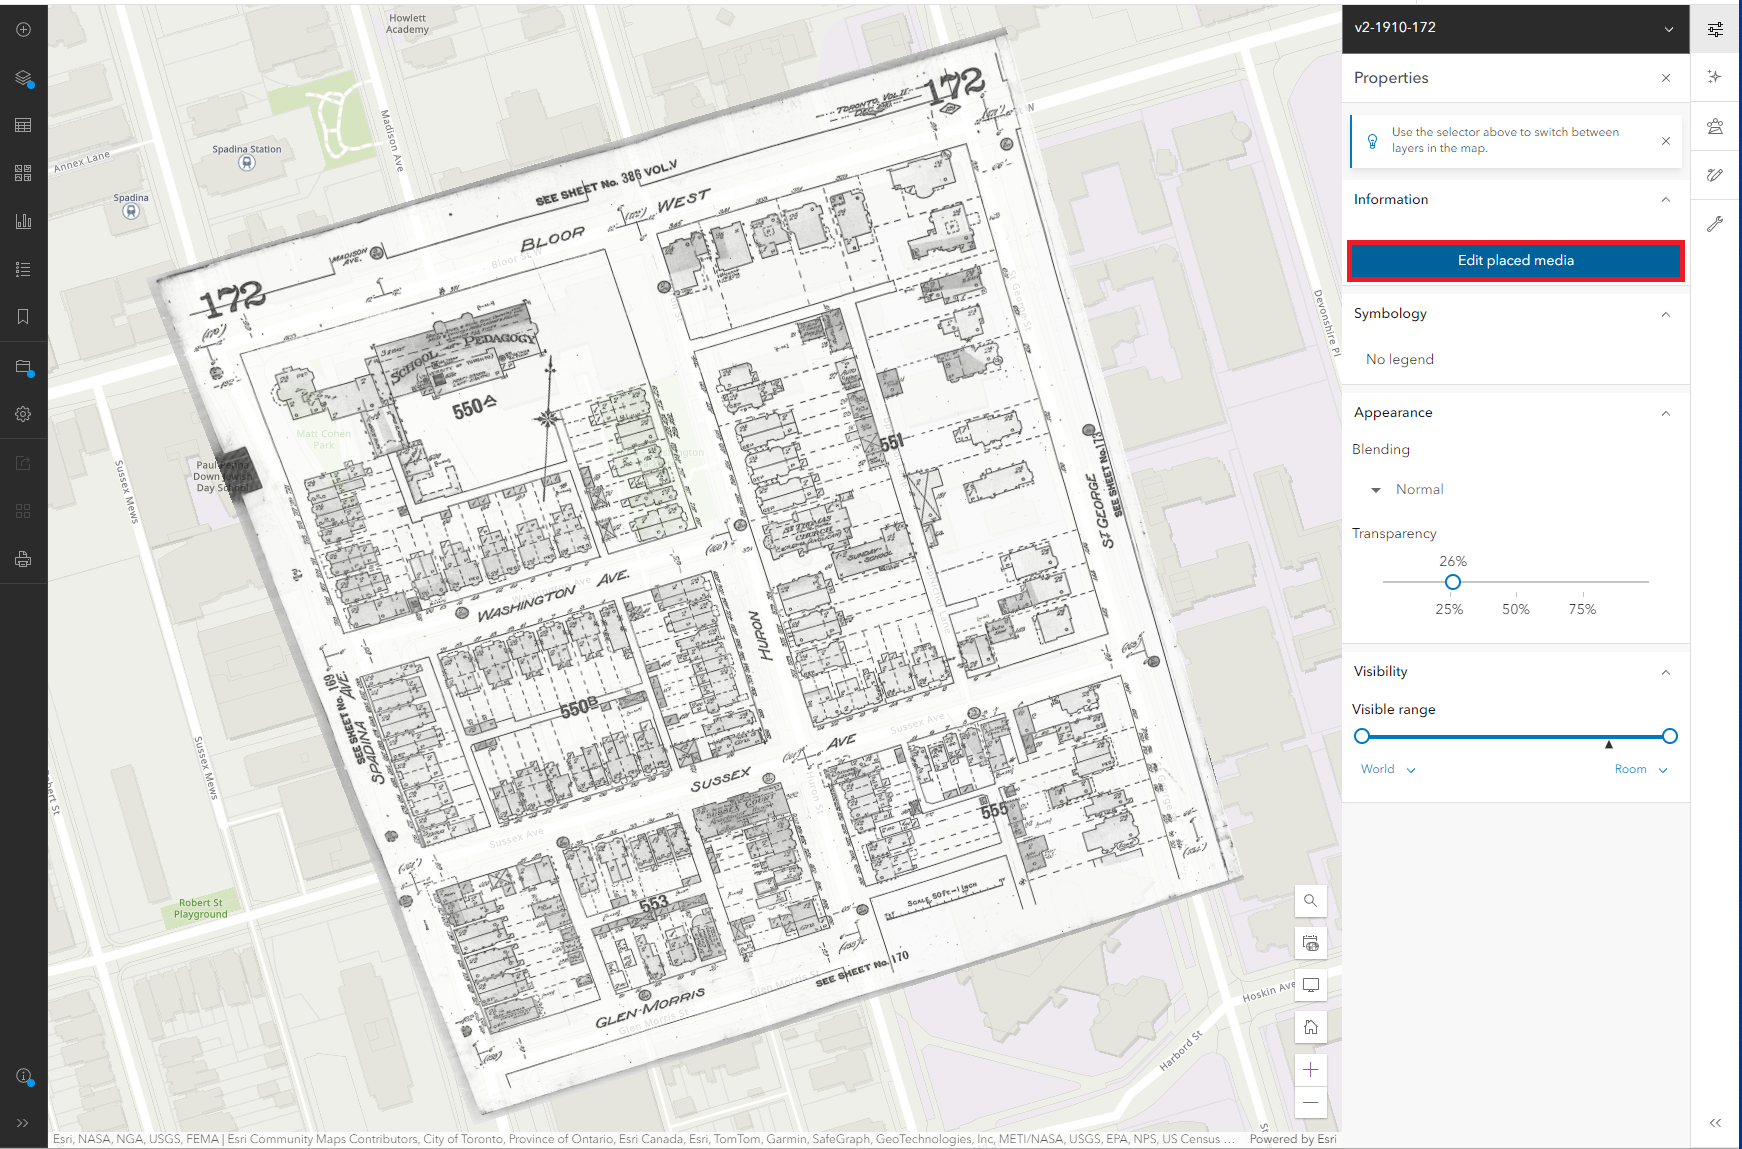
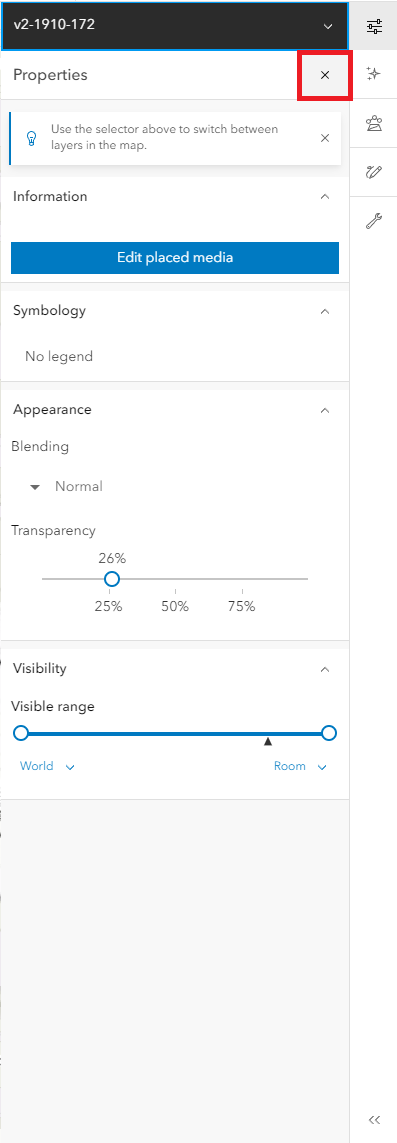
To work on other layers, you can close the layer information by selecting the X in the top right-hand corner.
3. If you have exited out of the layer to work on other layers, you can also get back into the media layer by selecting Layers > Show Properties > Edit Placed Media.
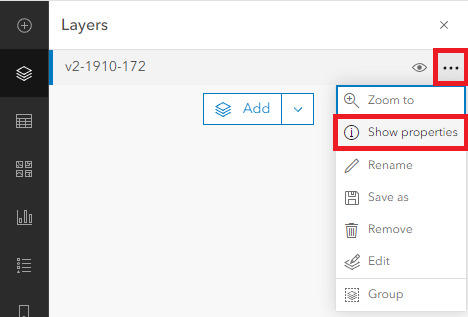
Saving
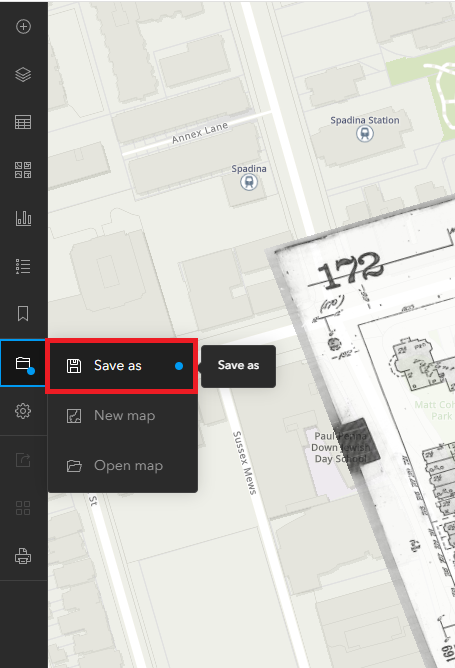
1. Once you are satisfied with your image, you can save your map. In order to save, select the folder icon from the left-hand menu and select Save As.
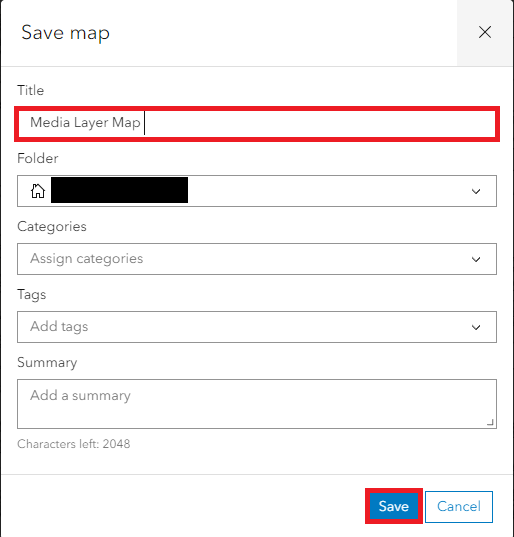
From there, it will take you to a pop-up menu in order to name and save your map.
And that's it!