Tables of Contents:
Understanding the Revelio Labs Datasets
Working with the Revelio Labs Datasets
Accessing the Environment
. Accessing the Environment via Terminal
. Accessing the Environment via Open OnDemand
Sample Python Code
Understanding the Revelio Labs Datasets
Note: Data Dictionaries for the six products listed below can be found here. The University of Toronto does not license the Transitions Dataset.
Workforce Dynamics
This dataset provides an overview of a company's composition. This includes headcounts, inflows, and outflows for every unique position, segmented by job, seniority, geography, salary, education, skills, and gender & ethnicity. Coverage is global, from 2007 - 2024, as a monthly time series.
Note: the Workforce Dynamics is a sample, selected by Revelio, of roughly the 10,000 largest global companies. It should include all public US companies.
Job Postings
This dataset includes active postings, new postings, removed postings, salaries, and full text of postings for any company, segmented by various employee characteristics (occupation, seniority, geography, keywords, skills, etc). This dataset is pulled from over 350 thousand company websites, all major job boards, and staffing firm job boards. Coverage is global, from 2021-2024.
There are three subfolders within this dataset: unified, linkedin, and indeed. The unified job postings is comprehensive of all sources and includes linkedin, indeed, companies sites, and other job aggregators. Note however that this folder contains fewer records as records in the unified folder have been deduplicated not only across sources but also within sources. So, a post that got posted 5 times on LinkedIn for seemingly the same role would only appear once in the unified postings.
Note also that the University of Toronto does not license the aggregate "Job Postings Dynamic" dataset, but only the individual-level data. Finally, although this is not listed in the data dictionary, these datasets do contain a "description" field with the original job description text, when available.
Sentiment
This dataset (/academic_sentiment_individual_reviews/) includes employee reviews for all companies, with the full text of each review split into positive and negative text. Reviews are mapped to various employee characteristics (occupation, seniority, geography). Coverage is global, from 2008-2024.
Update January 26, 2026: we received two additional datasets, "Sentiment Scores" (/standard_sentiment_scores/) and "Sentiment Review Trends" (/standard_sentiment_review_trends/), which are both aggregate data. Coverage is from 2018-2025, inclusive.
Layoff Notices
This dataset includes post data and effective date for all layoffs in every company in the United States. Coverage is limited to the US, and dates range from 2008-2020 to 2024, depending on the State.
Individual Level Data
This datasets contains data on the full professional history of individuals, including their roles, education, skills, gender, ethnicity, salary, seniority, and geography. Coverage is global, from 2008-2024.
Company Reference Data
This dataset contains information on companies that are covered by or referenced in the five other datasets listed above.
Working with the Revelio Labs Datasets
Creating an Account
- Get a Compute Canada account
- Opt into the Trillium service
- Upload an SSH key to CCDB
- Request Access to Revelio
- Setting up Multifactor Authentication
These steps only need to be completed once to gain access, and should normally only take a few days at most to be approved.
1. Get a Compute Canada account
Please visit the Compute Canada Database (CCDB) website and apply for an account (takes a day or two to approve).
Note: Students and postdocs need to be sponsored by their supervisor, who would need to already have a Compute Canada account (or create one first). This is a simple process, requiring the student to complete a form and their supervisor to approve the sponsorship. Computing resources would be sharing under the sponsor's allocation. Please contact the Map & Data Library for assistance, or for more information.
2. Opt in to the Trillium service
After the Compute Canada account is approved, you should opt in to the Trillium service on the CCDB website (or use this direct link). The opt-in will be approved manually after one or two days, which will give you access to the Trillium supercomputer and other SciNet systems, as long as the SSH key has been uploaded to the CCDB website (see next step).
Next, locate the Manage SSH Keys option on you account page on the CCDB website (or use this direct link) and upload your public SSH key. Instructions on creating SSH key pairs from the SciNet Wiki can help you with this process. This wiki also contains pages with more information on creating SSH key pairs specifically on a Windows machine, or on Mac or Linux machines. The Map & Data Library also provides a quick start tutorial for creating SSH key pairs on a Mac, if you need more help.
Access to the Revelio dataset is by request only. Please contact us to request access, including your SciNet account name.
Note there are other licensed datasets hosted on SciNet, such as the Web of Science PostgreSQL database, that require a separate approval process. Please see this page for more information on accessing those collections.
5. Setting up Multifactor Authentication
Access to all SciNet services now requires multifactor authentication. If you are not prompted to do so during your initial account setup, this can be done by logging into your Compute Canada account, and selecting Account > Multifactor Authentication from the top droptown menu. Please note thar although Duo is the recommended application for this, this is distinct from the multifactor authentication used for your utorID.
Accessing the Environment
If working in high performance computing environment is new to you, we would recommend you attend SciNet workshops to learn more, especially their Intro to SciNet & Triullium workshop (run periodically) or watch a recording of a previous session.
As of late 2025, there are now two distinct ways to access and query data hosted in this environment: via terminal, or using a web-based platform called Open OnDemand. Please read through the options below, and choose the one that works best based on your experence and comfort levels with programming.
Accessing the Environment via Terminal
Here are some steps to get your started on a Windows machine:
- To access the environment from a Windows machine, you will need an SSH client. We would recommend MobaXterm, and we will be using it in our tutorial examples
- Once you have installed MobaXterm, start it up
- From the Session menu, select New Session
- Select SSH from the top left
- For the remote host, use this format <computecanadausername>@trillium.scinet.utoronto.ca, substituting in your Compute Canada account username. For example, doej@trillium.scinet.utoronto.ca
- Click on the Advanced SSH settings tab below
- For SSH-browser type, select SCP (enhanced speed)
- Put a checkmark next to Use private key. Click on the blue page icon to browse to the private key you setup when creating your public key for your Compute Canada account
- Then click on OK to connect
- Enter in your Compute Canada account password
- You are now connected to the server
- To log out, type
exitand press Enter. Then press Enter again to close the tab
And the same steps, on a Mac:
- You do not need to install any programs or clients to access the environment from a Mac. Access is via Terminal.
- You will use an SSH key to connect. This requires some initial configuration, but once this is done it is both more secure and more convenient. If you have not already generated a key pair, instructions on how to do so can be found here. More detailed instructions are also available on the SciNet wiki. Remember, you'll need create a key-pair on any systems you intend to connect with!
- To login to the remote host, use this command in Terminal:
ssh -i .ssh/myprivatekeyname <computercanadausername>@trillium.scinet.utoronto.ca. The system will prompt you to enter the passphrase for your key (Note,-i .ssh/myprivatekeynameis only necessary if you are not using the default key filepath and filename. See complete SSH setup instructions here for more information). - You are now connected to the server
- To log out, type
exitand press Enter. You are now back in your local environment.
Querying the Datasets
All six datasets are in Apache Parquet format. This is a tabular datatype, similar to an Excel CSV file, but one that is capable of handling much larger files. Parquet files are binary, columnar files that are designed for reading and writing extremely large datasets, have built in compression and are optimized for analytics. For these reasons, these files can't be opened or manually inspected by humans. They need to be worked with using big data tools.
Each dataset / directory is composed of many parquet files, up to 11000 per folder. Company reference data provides for a unique identifier across most datasets in the form of a unique company ID, allowing for querying across directories.
Important Note: These files are read only. Although they can be queried and explored, new copies or subsets will need to be created during analysis.
- You will need to use Linux/UNIX command line in order to navigate the environment. Once logged into SciNet, navigate to the following folder using the cd command to change the current directory:
cd /project/restricted/mdl/revelio -
Type
lsto view a list of all folders inside the directory. You can then use thecdcommand to navigate to an individual directory. For example,cd academic_layoff
- Please note: some products contain multiple folders. For example, there are three folders related to the job postings dataset: academic_postings_indeed_individual, academic_postings_linkedin_individual and academic_postings_unified_individual. Please see the vendor documentation if the contents of each folder are unclear. Otherwise, contact us for additional support.
- Please also note: The academic_ prefix does not represent that the data refers only to academic institutions or research centres. The data is comprehensive across employment fields and segments. This denotes only that the data was purchased for academic use.
- You will need to use big data tools to work with this data. If working with python, PyArrow + Pandas provide excellent support for querying and analyzing parquet files. You can read more about working with PyArrow and Pandas via their oline documentation. Please note that there are other libraries and tools for working with these files. If you've like to explore other options, this guide is an excellent place to start.
-
Note: Queries and code run on the login node are for testing purposes only. Once you have compiled and tested your code or workflow on the Trillium login nodes, you will need to submit it as a job to be run on the compute node. Any lengthy process being run on the login node will be automatically stopped.
- If using Python, you will need to load a python module into your environment. SciNet provides excellent documentation on this. Note that Python 3.11.5 has been installed as a default module and does come pre-loaded with many useful packages including Pandas. However, as PyArrow is not part of this, you will need to follow the steps outlined by Scinet to set up a virtual environment in order to install PyArrow or other packages as needed. See below for screenshots of an example creationg of a new environment, revelioenv , as well as the activation of that enviromment and installation of Pyarrow. This follows the SciNet instructions linked above:
- Type
module load pythonin order to load the default Python module. - Next type
mkdir ~/.virtualenvto create a directory in your environment to store your new virtual environment - Next type
virtualenv --system-site-packages ~/.virtualenv/[myenvironmentname]envto create your new environment. - Next type
module load gcc arrowto activate the pyarrow engine. This must be done before activating your new virtual environment and installing pyarrow . - Next type
source ~/.virtualenv/[myenvironmentname]env/bin/activateto activate your environment. The name of your environment should now appear to the far left of your screen. - Finally type
pip install pyarrowto install the pyarrow module. There is no need to install pandas as this is one of the default packages.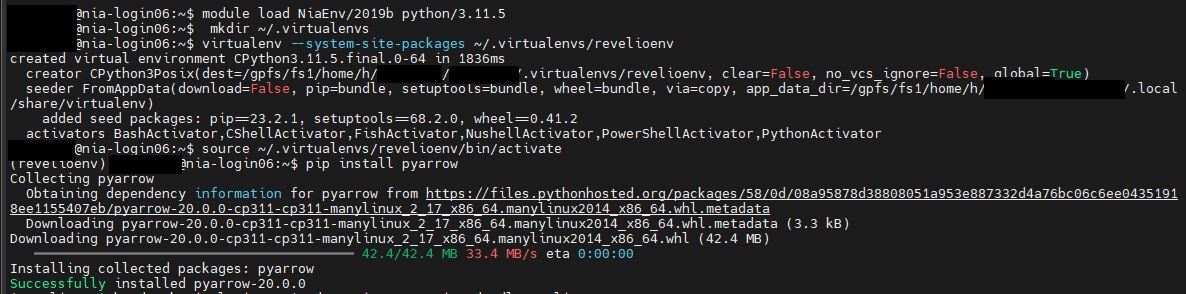
- Note: You can install as many modules as needed. You'll need to activate this environment every time you log in, and at the start of all your jobs scripts. However, the creation of then environment and installation of packages only needs to be done once. The next time you log in, you can skip steps A > C above and simply type steps D & E:
module load gcc arrowsource ~/.virtualenv/[myenvironmentname]env/bin/activate
- Note: You can install as many modules as needed. You'll need to activate this environment every time you log in, and at the start of all your jobs scripts. However, the creation of then environment and installation of packages only needs to be done once. The next time you log in, you can skip steps A > C above and simply type steps D & E:
- Type
- Once you have compiled and tested your script on a smaller subset of the data within the login node, you will need to submit it as a job to be run on one of SciNet's compute nodes, per SciNet's instructions. These instructions also include example submission scripts. The output will be written to your $SCRATCH directory.
- If you would prefer to use a different language to query the data, please see the relevant documentation on SciNet's website. For example, Parquet files can also be queried using C++ or Java.
Accessing the Environment via Open OnDemand
Open OnDemand (OOD) is a web-based platform that allows you to interact with Trillium through a web browser instead of via a terminal. As thereis no need to install any software on your local machine, the access instructions below apply regardless of your operating system:
- Once all steps under "Creating an Account" above have been completed, navigate to SciNet's installation of Open OnDemand to login to the system.
- Note that unlike when logging in to your Compute Canada account, this login page requires your username and not your utoronto email in order to authenticate.
- You will still be prompted to authenticate using multifactor authentication
-
Once logged in, you'll be presented with a landing page consisting of all applications currently available via the Open OnDemand System. These include entry points for terminal access, as well as a quick review of any active jobs.
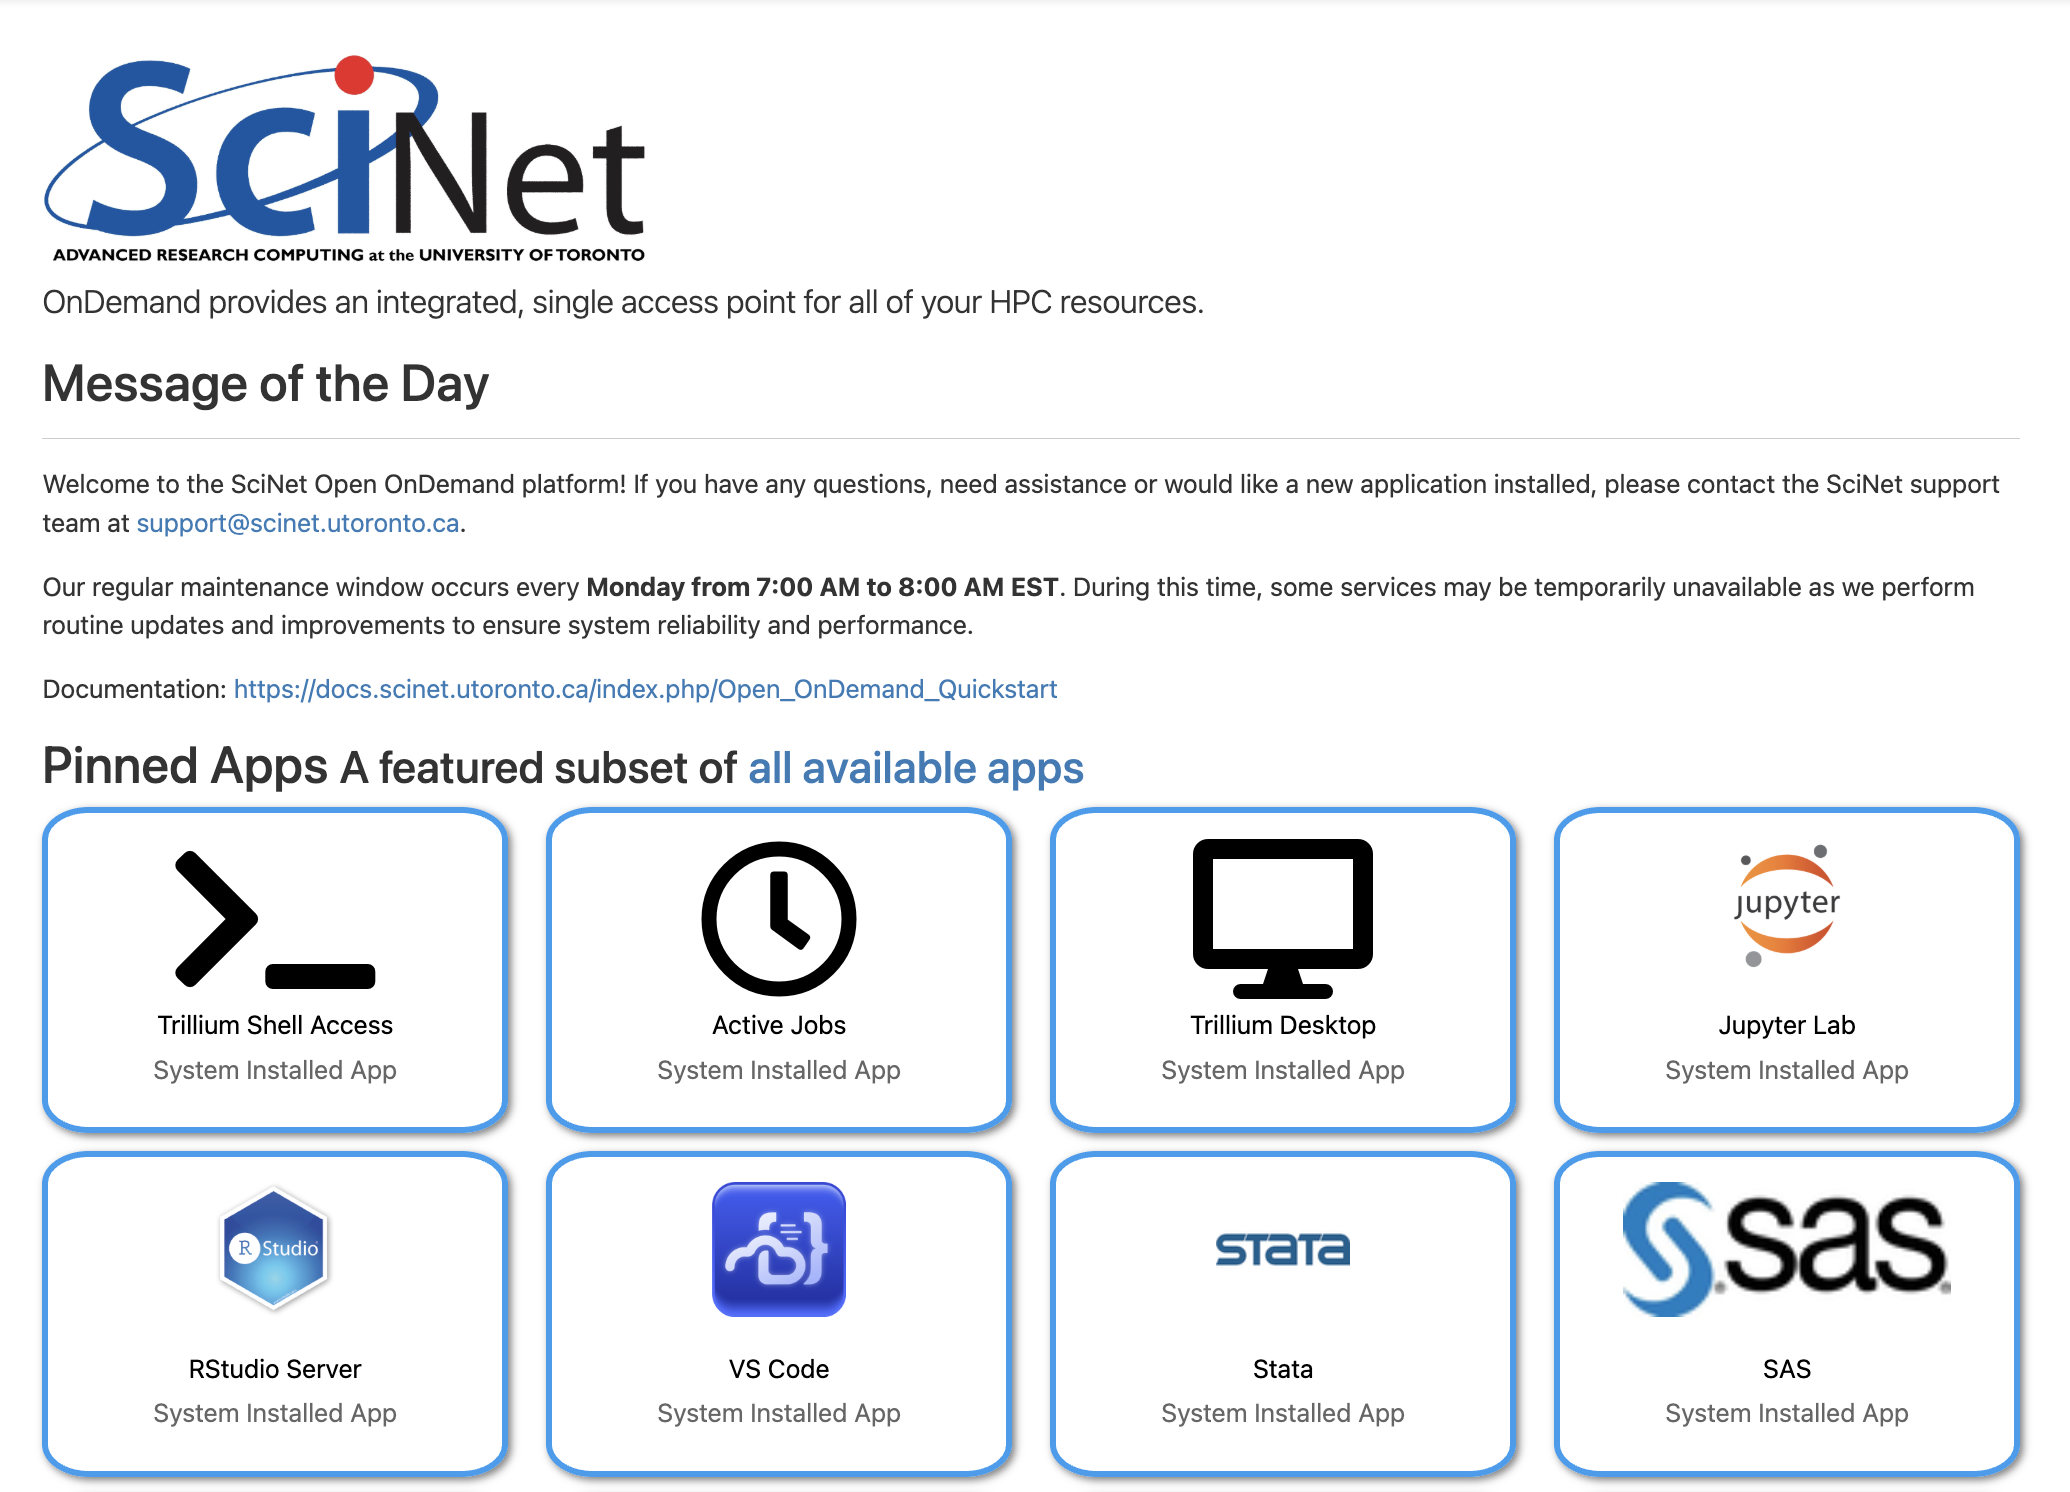
Note that while this tutorial will only cover access via Jupyter Lab, several other applications for coding are included, including RStudio and VS Code. Other applications for data analysis such as Stata and SAS are also available.
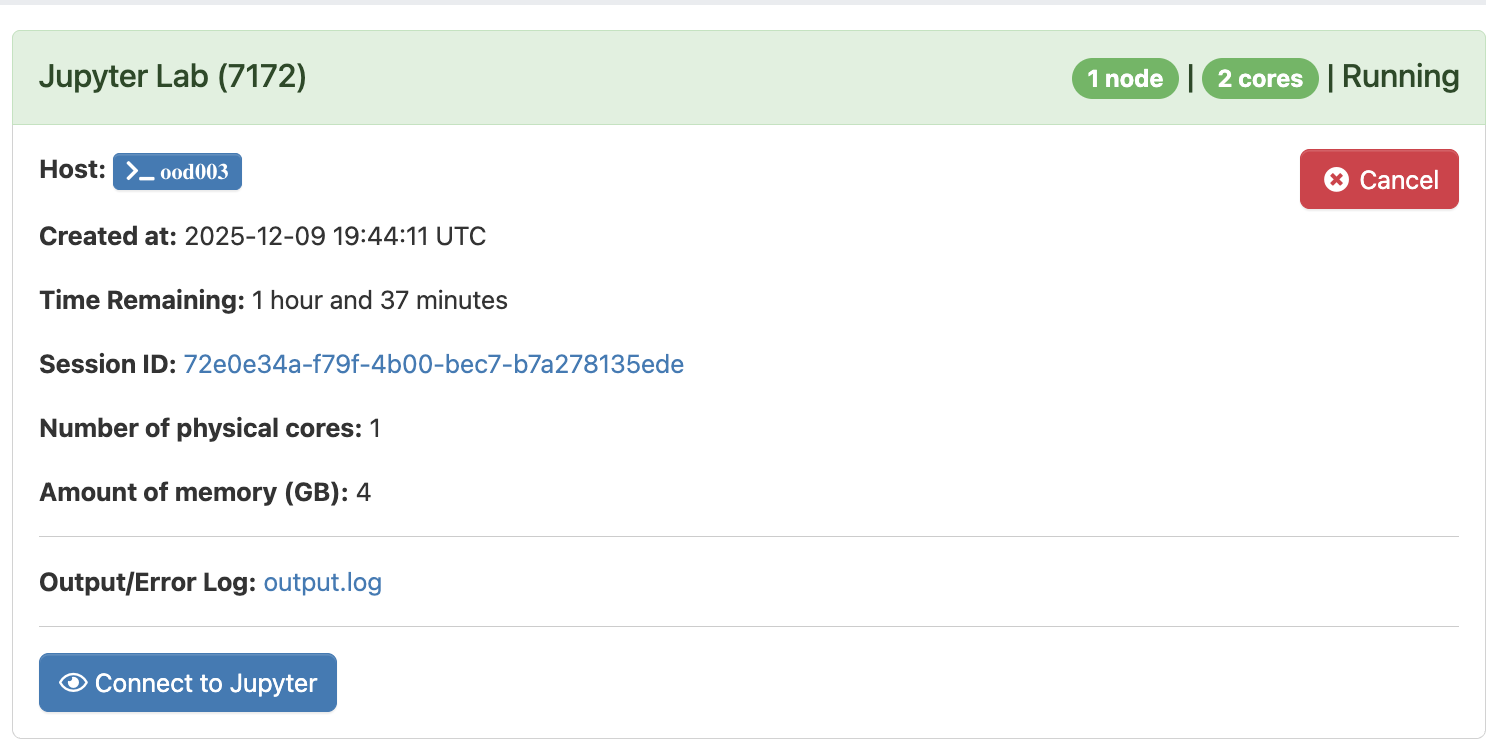
- Select Jupyter Lab in order to launch a new Jupyter Server on the Trillium Cluster. You will be prompted for several parameters, including expected number of hours for this session as well as computing requirements. As these datasets are fairly small in the context of high performance computing, "number of physical cores" can be set to "1", with "4" GB of memory.
-
Select Launch to begin your session. Note that it may take a minute to two to start up. Once the server is available, "Running" will appear as the status in top left, and you will be able to select the "Connect to Jupyter" button near the bottom to begin coding in Jupyter Labs
-
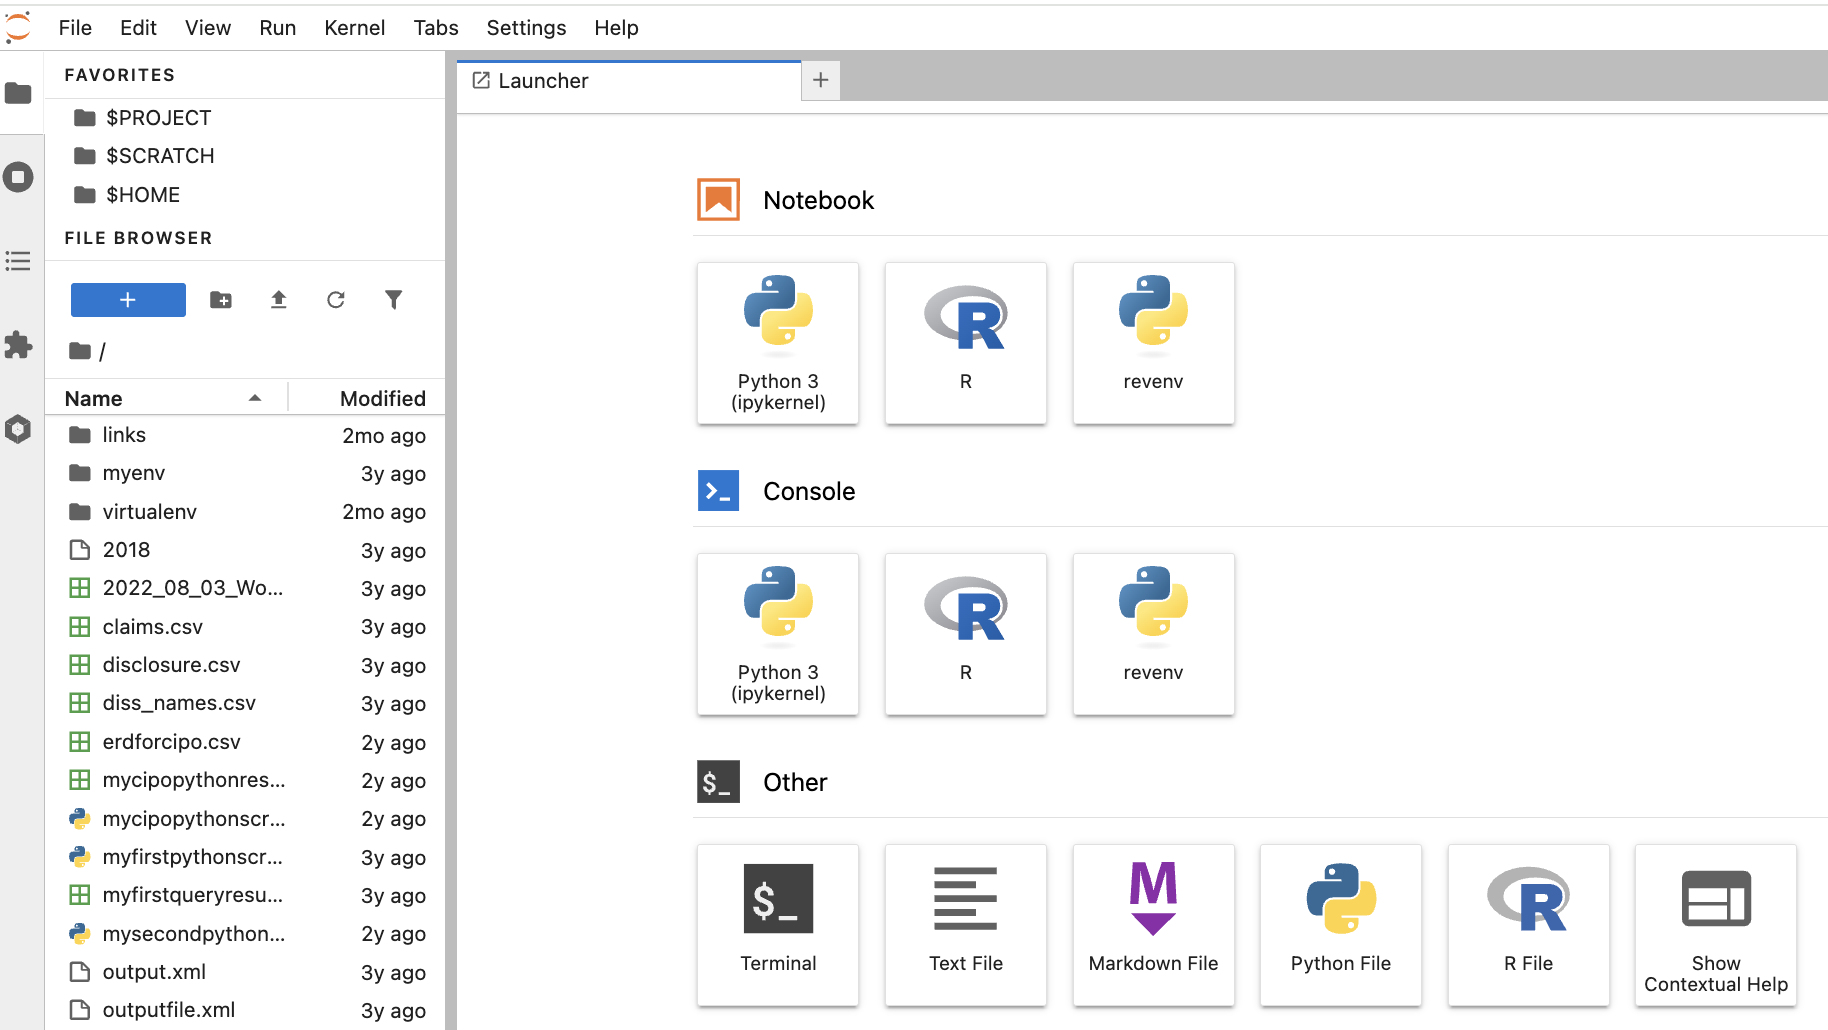
Once connected, you will see a list of your files to the left, and a Launcher in the centre screen. The launcher provides Jupyter Notebook or console/terminal programming environments for Python or R, as well as other options such as terminal access to the server or new text file creation near the bottom.
- If this is your first time using Jupyter Labs, please see their excellent documentation or review our own Workshop, "An Introduction to Programming for Absolute Beginners Using Python Pt. 1" which provides an overview of coding in Jupyter Notebooks (the executable document files that also form the basis of Jupyter Labs).
Querying the Datasets
All six datasets are in Apache Parquet format. This is a tabular datatype, similar to an Excel CSV file, but one that is capable of handling much larger files. Parquet files are binary, columnar files that are designed for reading and writing extremely large datasets, have built in compression and are optimized for analytics. For these reasons, these files can't be opened or manually inspected by humans. They need to be worked with using big data tools.
Each dataset / directory is composed of many parquet files, up to 11000 per folder. Company reference data provides for a unique identifier across most datasets in the form of a unique company ID, allowing for querying across directories.
Important Note: These files are read only. Although they can be queried and explored, new copies or subsets will need to be created during analysis.
- If you simply wish to browse the included files and folders, you will need to use Linux/UNIX command line via terminal in order to navigate the environment. From your JupyterLab session, select Terminal under Other from the Launcher. Navigate to the following folder using the cd command to change the current directory:
cd /project/restricted/mdl/revelio -
Type
lsto view a list of all folders inside the directory. You can then use thecdcommand to navigate to an individual directory. For example,cd academic_layoff
- Please note: some products contain multiple folders. For example, there are three folders related to the job postings dataset: academic_postings_indeed_individual, academic_postings_linkedin_individual and academic_postings_unified_individual. Please see the vendor documentation if the contents of each folder are unclear. Otherwise, contact us for additional support.
- Please also note: The academic_ prefix does not represent that the data refers only to academic institutions or research centres. The data is comprehensive across employment fields and segments. This denotes only that the data was purchased for academic use.
-
If you are already familiar with the folder structure, you can also use the os module in python to loop through / query the files in a particular directory

- You will need to use big data tools to work with this data. If working with python, PyArrow + Pandas provide excellent support for querying and analyzing parquet files. You can read more about working with PyArrow and Pandas via their oline documentation. Please note that there are other libraries and tools for working with these files. If you've like to explore other options, this guide is an excellent place to start.
-
Note: Queries and code run on the login node are for testing purposes only. Once you have compiled and tested your code or workflow on the Trillium login nodes, you will need to submit it as a job to be run on the compute node. Any lengthy process being run on the login node will be automatically stopped.
- We are already in a Python coding environment, and Python by default as installed by SciNet does come pre-loaded with many useful packages including Pandas. However, as PyArrow is not part of this, you will need to follow several steps in order to configure your environment to query Parquet files. This can be done either by installing and configuring a virtual environment and then porting that over to Open OnDemand or directly in Jupyter Lab itself. Please see the steps for both options below:
- Via Terminal (note this largely follows the terminal instructions provided abovs):
- Type
module load pythonin order to load the default Python module. - Next type
mkdir ~/.virtualenvto create a directory in your environment to store your new virtual environment - Next type
virtualenv --system-site-packages ~/.virtualenv/[myenvironmentname]envto create your new environment. - Next type
module load gcc arrowto activate the pyarrow engine. This must be done before activating your new virtual environment and installing pyarrow . - Next type
source ~/.virtualenv/[myenvironmentname]env/bin/activateto activate your environment. The name of your environment should now appear to the far left of your screen. - Finally type
pip install pyarrowto install the pyarrow module. There is no need to install pandas as this is one of the default packages.- Note: You can install as many modules as needed.
-
Once PyArrow is installed, and with your virtual machine still active, simply type
venv2jupto port your environment over to Open OnDemand. This will now appear as as option in Jupyter Labs for both Notebook and Console access. For example, the revenv option below:
- Type
- Directly in Jupyter Labs:
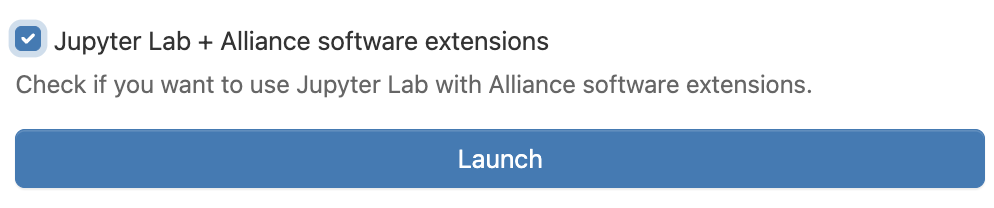
- When launching a new Jupyter Labs server, select the check box for "Jupyter Lab + Alliance software extensions"
-
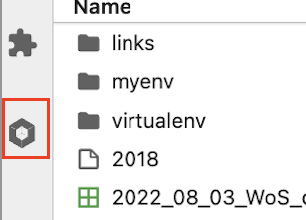
Inside Jupyter navigate to the left-hand panel and click on "Software Modules" at the bottom
-
Load the arrow/21.0.0 module by searching for "arrow", and selecting this from the left side dropdown
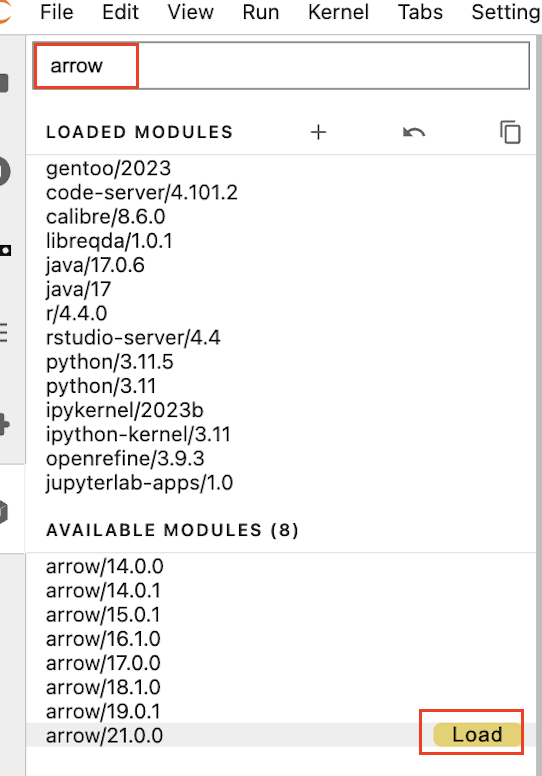
- Open a new Python 3.11 Notebook from the Launcher, and you should now be able to import pyarrow using the command
import pyarrow - Note that unlike with the Terminal enviroment option, you will need to re-load the Pyarrow module within each Jupyter Lab server session. For this reason, creating a custom environment, although more complicated, may make more sense if there are additional modules you are also planning to use in each session.
- When launching a new Jupyter Labs server, select the check box for "Jupyter Lab + Alliance software extensions"
- Once you have compiled and tested your script on a smaller subset of the data within the login node, you will need to submit it as a job to be run on one of SciNet's compute nodes. An application exists in OnDemand called Open Composer, which lets you submit Slurm jobs directly to Trillium and allows you to edit job parameters via a form.
- Move your python script into your $SCRATCH directory
- From the Open OnDemand landing page, select Open Composer > Python Slurm Job and complete the required fields including script name and location. Click Submit
- Please see SciNet's guide for FAQ and more information on using Open Composer.
- Via Terminal (note this largely follows the terminal instructions provided abovs):
Sample Python Code
Running Python code in Terminal
- Once PyArrow is installed, simply type
python3within your virtual enviromment to begin writing code. To run code line by line in order to examine the contents of a sample file within a dataset:- Type
python3to run Python code within your environment - Next type
import pandas as pdto import the pandas module under the shorthand pd - Next type
education = pd.read_parquet('individual_user_education_0009_part_00.parquet', engine='pyarrow'). This is creating a dataframe - panda's version of a spreadsheet - , and assigning it to a variable called education. This will allow us to visualize, sort and query our data as an object within python. - Next type
education.head(). The .head() function in pandas provides a preview of the first 5 rows of our dataframe.
- You can use Pandas to filter even further, and then export any results to a CSV. For example, let's say we want to filter for cases where the university_name is equal to "University of Toronto":
- Create a new dataframe containing only those results:
toronto = education[education['university_name'] == 'University of Toronto'] - Export those results to a csv:
toronto.to_csv('toronto_education.csv')
- Create a new dataframe containing only those results:
- Type
- Sample code for filtering across several different Revelio labs datasets can be found under Running Python code in Open OnDemand below
- For more help on using Pandas to subset your data:
- Pandas is an excellent library with many function that are tailored for working with tabular data files such as the Revelio Labs datasets. More detailed information on Pandas can be found in their documentation.
- For more detailed examples of querying tabular data files in order to subset / extract a smaller selection as a CSV, please see the sample notebook files available for download at the bottom of our Data Axle tutorial.
- Instead of running code line by line, you could also choose to upload a script and run this within the environment. In order to do this on a Windows machine:
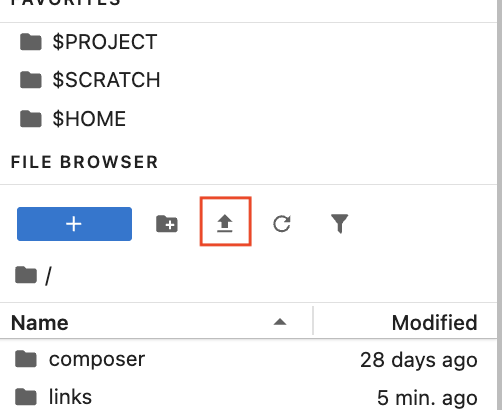
- From the MobaXterm interface, you should see a sidebar to the left of your terminal window. Click on the orange globe icon on the far left to open the file explorer tab. This should now list all the files in your personal directory on the Trillium server
- Click on the upload icon at the top (looks like an arrow pointing up)
- You should be prompted to select the file you want to upload from your local computer. Select the file and then click on OK
- Make sure your python environment is activated, and type
python [nameofyourscript].py
- In order to upload a script on a Mac:
- Open a new Terminal window that is not connected to Niagara (ie. your local directory), and run the following command:
scp /your/local/directory/:[filename and extension] <computecanadausername>@trillium.scinet.utoronto.ca:/home/[firstinitialofyourlastname]/<computecanadausername>/<computecanadausername>.Note: If you are not the Principal Investigator ie. your account was sponsored by another user, you'll need to substitute that person's username in place of the first<computecanadausername>, as well as their first initial in [firstinitialofyourlastname]. In this case:scp /your/local/directory/:[filename and extension] <computecanadausername>@trillium.scinet.utoronto.ca:/home/[firstinitialofyoursponsorslastname]/<sponsorscomputecanadausername>/<computecanadausername>- For example:
scp /Users/user/Documents/SciNet/myfirstpythonscript.py doej@trillium.scinet.utoronto.ca:/home/d/doej/doej - For example, for a sponsored account (smithp sponsored by doej):
scp /Users/user/Documents/SciNet/myfirstpythonscript.py smithp@trillium.scinet.utoronto.ca:/home/d/doej/smithp - If prompted, enter your SSH key passphrase
- For example:
- Once your script has been uploaded, connect to trillium, activate your python environment, and type
python [nameofyourscript].py
- Open a new Terminal window that is not connected to Niagara (ie. your local directory), and run the following command:
Running Python code in Jupyter Labs
- Once in your Jupyter Lab notebook with pyarrow installed (using either option in the Accessing the Environment via Open OnDemand section above), type
import pandas as pdto import the pandas library, andimport pyarrowto import pyarrow - You can use the same code as above to examine individual files, for example
education = pd.read_parquet('individual_user_education_0009_part_00.parquet', engine='pyarrow') -
You may often, however, want to merge and filter across different datasets. For example, let's say we want to merge position and education data, to view the most recent job data for people with a degree in Computer Science. To do this, we would want to look at both the academic_individual_user_education data, and the academic_individual_position data. Please click here to download a sample script with notes, as a getting started guide to similar queries. The script can be uploaded to your JupyterLab by clicking on the "upload file" button from your home directory
- This script:
- Reads in both files as pandas dataframes.
- Filters the education data for cases where the value of the "field_raw" column is equal to "Computer Science"
- Filters the position data to keep only the most recent position associated with each user_id. This is done by converting that field to datetime format, dropping null values, sorting by newest, and then dropping duplicate user_ids
- Merges the datasets on user_id, keeping all columns
-
You can then query your results by using
merged.head()to preview the first few rows of data
- Note if not all columns are displayed, try using
pd.set_option('display.max_columns', None)to force python to display all columns by defaut
- Note if not all columns are displayed, try using
If you have any question, feel free to contact us.